In the world of portable generators, understanding the nuances of their components is vital for ensuring seamless performance. One crucial element that often demands attention is the capacitor. But how do you navigate the waters of how to test a portable generator capacitor? It’s not just about technical know-how; it’s about empowering individuals to take control of their energy sources.
In this guide, we embark on a journey to demystify the process, breaking down complexities and providing insights that empower you to troubleshoot with confidence. Discover the key to unlocking your generator’s potential as we delve into the art and science of assessing its heartbeat—the capacitor.
Jump to a Specific Section
- 1 Main Points
- 2 What is a Capacitor?
- 3 What Does a Capacitor do in Portable Generator?
- 4 Why Do You Need to Test the Capacitor of Your Portable Generator?
- 5 How to Test a Portable Generator Capacitor?
- 6 Troubleshooting Common Generator Capacitor Issues
- 7 Generator Maintenance Tips
- 8 Generator Safety Tips
- 9 Conclusion
- 10 References
- 11 Frequently Asked Questions
- 11.1 What Is the Average Cost of a Portable Generator Capacitor?
- 11.2 What Is the Best Way to Store a Portable Generator Capacitor?
- 11.3 Are There Any Safety Considerations When Testing a Portable Generator Capacitor?
- 11.4 What Are the Benefits of Regularly Testing a Portable Generator Capacitor?
- 11.5 How Often Should a Portable Generator Capacitor Be Tested?
- 11.6 What happens when a capacitor goes bad on a generator?
- 11.7 Can a generator operate without a capacitor?
- 11.8 Should a capacitor have continuity?
Main Points
- Regular testing ensures optimal performance of the generator
- Proper testing prevents further damage or malfunctioning
- Visual inspection for safety and signs of damage or wear
- Testing capacitance and voltage confirms performance and helps troubleshoot common capacitor problems
What is a Capacitor?
A capacitor is a passive two-terminal electronic component that stores electrical energy in an electric field. Its primary function is to store and release electrical energy as needed, providing a dynamic and responsive element within circuits.
The capacitance, measured in farads (F), defines the amount of charge a capacitor can store per unit voltage. Capacitors come in diverse types, such as electrolytic, ceramic, and tantalum, each catering to specific applications. This crucial component finds extensive use in smoothing voltage fluctuations, filtering signals, and shaping waveforms in electronic systems.
To illustrate, imagine a scenario where a capacitor acts as a buffer, stabilizing the power supply in a sensitive electronic device, ensuring consistent performance and longevity.
What Does a Capacitor do in Portable Generator?
Understanding the crucial components of a portable generator is essential for optimal usage. Among these components, the capacitor plays a pivotal role in ensuring smooth and efficient operation. Essentially, a capacitor is an electrical storage device that stores and releases energy as needed. In the context of a portable generator, the capacitor is responsible for addressing fluctuations in voltage, stabilizing the electrical output, and supporting overall performance.
In a portable generator, the capacitor’s primary function is to regulate voltage. As the generator produces electricity, the capacitor stores excess electrical energy during peak periods and releases it during times of increased demand. This process helps maintain a consistent and stable voltage output, preventing potential damage to connected devices or appliances. Without a properly functioning capacitor, voltage irregularities could occur, leading to inefficiencies and potential risks.
Additionally, capacitors contribute to the startup process of a generator. When the generator is initially turned on, the capacitor provides an extra burst of power to get the engine running. This is particularly crucial in instances where the generator needs to support heavy loads or start electric motors. A well-maintained capacitor ensures a reliable and prompt startup, enhancing the overall reliability of the portable generator.
In summary, a capacitor in a portable generator serves as a critical component for voltage regulation and smooth startup. Its ability to store and release electrical energy at the right moments ensures a consistent power supply, making it an integral part of the generator’s functionality.
Why Do You Need to Test the Capacitor of Your Portable Generator?
A generator’s capacitor plays a pivotal role in its overall functionality, affecting aspects like power output and stability. Here’s why testing the capacitor is essential:
- Preserving Power Output: A faulty capacitor can lead to a decline in the generator’s power output. Regular testing helps identify issues early, ensuring consistent and reliable power supply when needed.
- Ensuring Stability: The capacitor is instrumental in maintaining a stable electrical flow. Testing helps detect any irregularities, preventing unexpected power fluctuations that could damage connected devices.
- Prolonging Generator Lifespan: Timely capacitor testing can contribute to the overall longevity of your portable generator. Identifying and addressing capacitor issues early on can prevent further damage to other components, extending the generator’s lifespan.
- Preventing Costly Repairs: Ignoring capacitor testing may result in more significant problems down the line, leading to costly repairs or even the need for a replacement generator. Regular testing is a cost-effective preventive measure.
- Optimizing Fuel Efficiency: A well-functioning capacitor ensures efficient energy transfer, contributing to better fuel efficiency. Regular testing helps maintain optimal generator performance, saving on fuel costs over time.

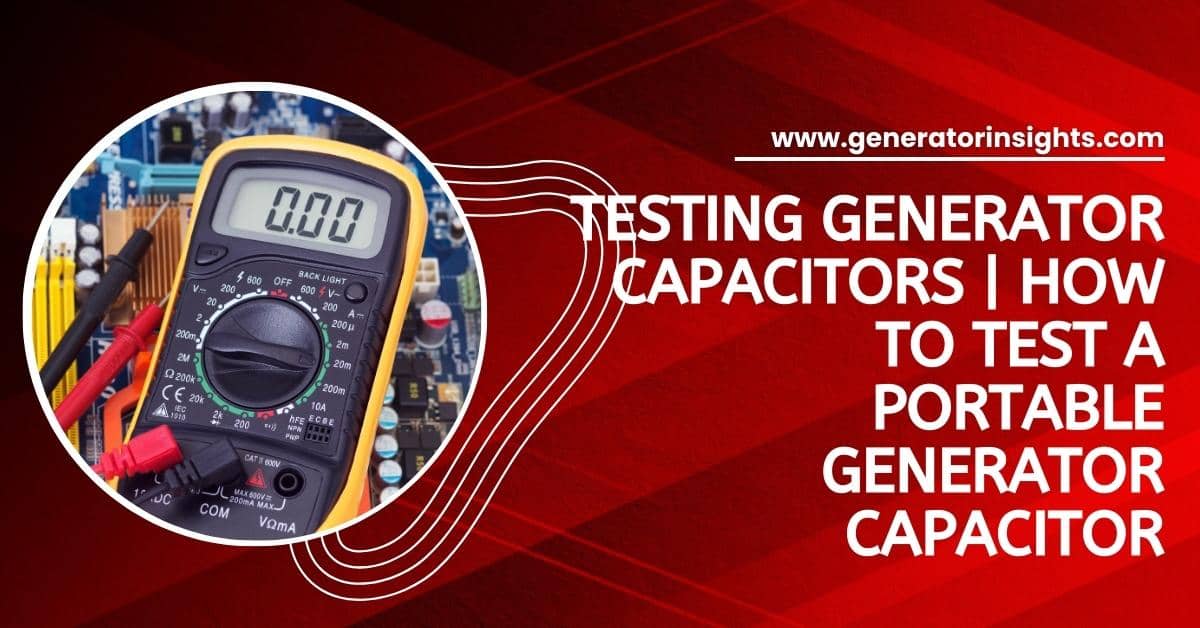
How to Test a Portable Generator Capacitor?
When it comes to ensuring the optimal performance of your portable generator, testing the capacitor is a crucial step. The capacitor plays a key role in providing the necessary boost to start the generator. Here’s a comprehensive guide on how to test a portable generator capacitor:
- Safety First:
- Before starting the testing process, ensure the generator is turned off and completely disconnected from any power source.
- Discharge the capacitor by shorting the terminals with an insulated screwdriver to prevent any electrical shocks.
- Access the Capacitor:
- Locate the capacitor housing on the generator. It is usually situated near the alternator or the engine.
- Identify Capacitor Terminals:
- Take note of the capacitor terminals. There should be at least two – one for positive and one for negative.
- Use a Multimeter:
- Set your multimeter to the ohms setting. This will allow you to measure resistance.
- Touch the multimeter probes to the capacitor terminals. Take note of the initial resistance reading.
- Capacitor Discharge Test:
- After noting the initial resistance, short the capacitor terminals with an insulated tool.
- Measure the resistance again. A significant drop in resistance indicates a functional capacitor.
- Check for Continuity:
- Set the multimeter to the continuity test mode.
- Touch one probe to a capacitor terminal and the other to the generator’s frame. A continuous beep confirms good continuity.
- Visual Inspection:
- Inspect the capacitor for any visible signs of damage, such as leaks, bulges, or burns. These indicate a malfunctioning capacitor.
By following these steps, you can confidently assess the health of your portable generator’s capacitor, ensuring reliable performance when you need it most.

Now let’s discuss these points in detail.
Safety First
Ensuring the safety of both yourself and the equipment is paramount when testing a portable generator capacitor. Follow these step-by-step guidelines:
- Turn Off the Generator:
- Before you begin the testing process, make sure the portable generator is completely turned off. This involves shutting down the engine and ensuring all switches are in the “off” position.
- Disconnect from Power:
- Ensure the generator is completely disconnected from any power source. This prevents any accidental electrical shock during the testing procedure.
- Capacitor Discharge:
- Before handling the capacitor, discharge it to eliminate any residual electrical charge. Use an insulated screwdriver to short the terminals. This step is crucial for your safety and should not be skipped.
- Personal Protective Equipment (PPE):
- Consider wearing personal protective equipment, such as safety gloves and goggles, to protect yourself from any potential hazards.
By prioritizing safety and adhering to these precautions, you create a secure environment for testing the portable generator capacitor. Remember, a safe testing process is a key foundation for accurate and effective diagnostics.
Access the Capacitor
Accessing the capacitor is the next step in the process of testing your portable generator. Here’s a detailed breakdown:
- Locate the Capacitor Housing:
- Identify the capacitor housing on the generator. Typically, it is situated near the alternator or the engine. Refer to the generator’s manual if you’re unsure about the exact location.
- Remove Protective Coverings:
- If there are any protective coverings or panels over the capacitor, remove them carefully. This provides clear access for testing and inspection.
- Inspect for Accessibility:
- Ensure that you have sufficient space and visibility to work with the capacitor. This step is crucial for performing accurate tests and examinations.
- Secure Any Moving Parts:
- If the capacitor is located near moving parts, secure them in place. This prevents any accidents or interference during the testing process.
By effectively accessing the capacitor, you set the stage for a thorough examination and testing. This step is pivotal in preparing the capacitor for the evaluation process outlined in subsequent steps.
Identify Capacitor Terminals
Identifying the capacitor terminals is a crucial step in the process of testing a portable generator capacitor. Follow these steps to ensure accurate identification:
- Locate Terminal Points:
- Examine the capacitor to locate its terminal points. There should be at least two terminals – one for positive and one for negative.
- Refer to the Manual:
- Consult the generator’s manual if needed to confirm the identification of capacitor terminals. The manual provides specific details about the generator’s components and their locations.
- Color Coding (If Applicable):
- Some generators may have color-coded terminals. Identify these colors and correspond them to the positive and negative terminals.
- Labeling (If Applicable):
- Look for any labels or markings on the capacitor indicating positive (+) and negative (-) terminals. This information ensures accurate testing and prevents confusion.
By clearly identifying the capacitor terminals, you pave the way for precise testing using a multimeter in the subsequent steps. Accurate identification is essential for obtaining reliable results during the testing process.
Use a Multimeter
Using a multimeter is a critical step in the process of testing a portable generator capacitor. Here’s a detailed guide on how to use this essential tool for capacitor testing:
- Set the Multimeter to Ohms:
- Turn on the multimeter and set it to the ohms setting. This setting allows you to measure resistance, a key parameter in capacitor testing.
- Probe Placement:
- Take the multimeter probes and touch them to the capacitor terminals. Ensure a secure connection between the probes and terminals.
- Initial Resistance Reading:
- Observe and record the initial resistance reading on the multimeter. This measurement serves as a baseline for comparison.
- Choose the Proper Range:
- Select an appropriate ohms range on the multimeter. This ensures that the resistance reading falls within the instrument’s accurate measurement range.
- Stable Reading:
- Wait for the multimeter reading to stabilize. A stable reading indicates a steady state of resistance, providing a more accurate measurement.
- Example Scenario:
- For instance, if the initial resistance reading is 0.5 ohms, this is the baseline measurement. Subsequent tests will be compared to this value.
By following these steps, you can effectively use a multimeter to measure the resistance of the capacitor. This measurement is crucial in assessing the capacitor’s health and functionality during the testing process.
Capacitor Discharge Test
Conducting a capacitor discharge test is a key step in evaluating the health of a portable generator capacitor. Follow these detailed steps for an effective discharge test:
- Short the Capacitor Terminals:
- Using an insulated tool, short the capacitor terminals. This step discharges any remaining electrical charge in the capacitor.
- Observe Resistance Drop:
- Measure the resistance again immediately after the discharge. A significant drop in resistance from the initial reading indicates a functional capacitor.
- Interpret the Results:
- Compare the post-discharge resistance with the initial reading. A substantial decrease suggests that the capacitor is capable of releasing stored energy effectively.
- Repeat the Test:
- If necessary, repeat the discharge test to ensure consistent results. A consistent drop in resistance strengthens the reliability of the capacitor.
- Example Scenario:
- For example, if the initial resistance was 0.5 ohms and drops to 0.1 ohms after the discharge, this indicates a well-functioning capacitor. Consistency in such results is indicative of capacitor health.
By performing a capacitor discharge test, you can assess the capacitor’s ability to release stored energy, a critical aspect of its functionality in supporting the generator’s startup. This test provides valuable insights into the overall health of the capacitor.
Check for Continuity
Checking for continuity is an additional step in the comprehensive testing process for a portable generator capacitor. Follow these steps to ensure proper continuity:
- Set the Multimeter to Continuity Test:
- Switch the multimeter to the continuity test mode. This mode is used to check if there is a continuous electrical path between two points.
- Probe Placement:
- Touch one multimeter probe to a capacitor terminal and the other to the generator’s frame or a known ground. This checks for continuity between the capacitor and the generator’s frame.
- Listen for a Beep:
- If the multimeter emits a continuous beep, it confirms good continuity. This indicates that there is an uninterrupted electrical path.
- Repeat for the Other Terminal:
- Repeat the continuity test for the other capacitor terminal. A beep in both tests affirms that the capacitor is effectively connected.
By checking for continuity, you ensure that the capacitor is effectively integrated into the generator’s electrical system. This step provides an additional layer of confirmation regarding the capacitor’s functionality and its contribution to the overall generator operation.
Visual Inspection
Conducting a visual inspection is a crucial aspect of testing a portable generator capacitor. Follow these steps to visually assess the capacitor’s condition:
- Inspect for Physical Damage:
- Carefully examine the capacitor for any visible signs of damage, such as leaks, bulges, or burns. These may indicate internal issues affecting its performance.
- Check for Discoloration:
- Look for any discoloration on the capacitor. Unusual colors, especially dark spots or staining, can be indicative of overheating or other problems.
- Examine Terminal Connections:
- Inspect the connections at the capacitor terminals. Ensure they are secure and free from corrosion, as loose or corroded connections can affect performance.
- Review Manufacturer’s Guidelines:
- Refer to the generator’s manual or manufacturer’s guidelines for any specific visual inspection instructions. This ensures adherence to recommended practices.
By visually inspecting the capacitor, you can identify potential issues that may not be apparent through other testing methods. This step adds an extra layer of assurance regarding the capacitor’s physical condition and overall reliability in supporting the generator’s functionality.
Review Test Results
After completing the comprehensive testing process for your portable generator capacitor, it’s time to draw conclusions and determine the appropriate next steps:
- Review Test Results:
- Evaluate the results of each testing step. Consider the initial resistance, the drop after discharge, continuity, and the visual inspection findings.
- Functional Capacitor:
- If the capacitor demonstrates consistent readings, good continuity, and shows no signs of physical damage, it is likely functioning well. This is an indication of a reliable component in your generator.
- Malfunctioning Capacitor:
- If there are irregularities in the readings, poor continuity, or visible damage, it suggests a malfunctioning capacitor. In such cases, replacement may be necessary.
- Replacement Considerations:
- Refer to the generator’s manual or consult with a professional to determine the specific replacement capacitor needed. Ensure compatibility and follow proper installation procedures.
- Routine Maintenance:
- Incorporate routine capacitor checks into your generator maintenance schedule. Regular testing helps identify potential issues early, preventing unexpected failures during critical times.
- Professional Assistance:
- If you’re unsure about the results or lack experience in generator maintenance, consider seeking professional assistance. A qualified technician can provide expert guidance and ensure accurate assessments.
By concluding the testing process with a thorough review, you can make informed decisions about the condition of your portable generator capacitor. Whether it’s in good working order or requires replacement, taking appropriate actions ensures the continued reliability of your generator.
Troubleshooting Common Generator Capacitor Issues
Generators play a pivotal role in providing a reliable power source, especially during emergencies. However, capacitor issues can disrupt their functionality. Let’s delve into common problems and how to troubleshoot them effectively.
| Issue | Symptoms | Troubleshooting Steps |
|---|---|---|
| 1. Capacitor Leakage | Unusual fluid around the capacitor | – Inspect for visible leaks and corrosion. – Replace the leaking capacitor with a new one. |
| 2. Capacitor Bulging | Bulging or deformation of the capacitor | – Examine for physical deformities. – Replace the bulging capacitor promptly to prevent further damage. |
| 3. Capacitor Overheating | Excessive heat during operation | – Check for proper ventilation. – Upgrade to a higher-rated capacitor if necessary. – Monitor heat dissipation regularly. |
| 4. Capacitor Discharge Issues | Generator fails to start or sudden shutdown | – Test the capacitor’s discharge rate. – Replace if the discharge is not within the specified range. |
| 5. Capacitor Connection Problems | Loose or corroded connections | – Inspect and tighten capacitor connections. – Clean corroded terminals to ensure a secure electrical connection. |
By addressing these common capacitor issues, you can enhance the reliability and longevity of your generator, ensuring it stands ready when you need it the most.
Generator Maintenance Tips
Ensuring your generator runs smoothly is crucial for uninterrupted power supply. Regular maintenance not only extends its lifespan but also prevents costly breakdowns. Here are essential tips to keep your generator in peak condition:
- Scheduled Inspections: Conduct thorough visual inspections every month, checking for loose wires, leaks, and any signs of wear and tear.
- Oil Level Check: Regularly monitor the oil levels. Low oil can lead to engine damage. Follow the manufacturer’s guidelines for the correct oil type and change intervals.
- Air Filter Replacement: Clean or replace the air filter as recommended by the manufacturer. A clogged filter reduces efficiency and can strain the generator.
- Fuel System Maintenance: Ensure the fuel system is clean and free of contaminants. Use a fuel stabilizer if the generator is not in frequent use to prevent fuel degradation.
- Battery Inspection: Check the battery terminals for corrosion and ensure they are tightly connected. Weak batteries can hinder starting and overall performance.
- Cooling System Care: Inspect the cooling system for debris and make sure the radiator fins are clean. Overheating can cause serious damage to the generator.
- Run the Generator Monthly: Even if there’s no power outage, run the generator for a short period each month. This keeps internal parts lubricated and ensures it’s ready when needed.
- Keep a Log: Maintain a maintenance log, noting each inspection, oil change, and part replacement. This log helps in tracking the generator’s health and aids in timely preventive measures.
Following these generator maintenance tips diligently ensures that your power backup system is reliable and ready to serve when required.
Generator Safety Tips
Generators are invaluable during power outages, but it’s crucial to prioritize safety. Follow these tips to ensure the proper and secure use of your generator:
- Outdoor Placement: Always operate your generator outdoors to prevent the buildup of harmful fumes. Maintain a safe distance from windows and doors.
- Ventilation: Adequate ventilation is essential. Keep the generator in an open space to disperse exhaust fumes and reduce the risk of carbon monoxide poisoning.
- Dry Environment: Place the generator on a dry surface to avoid electrical hazards. Keep it away from puddles or wet areas to prevent the risk of electric shock.
- Grounding: Properly ground the generator to reduce the risk of electric shock. Follow the manufacturer’s guidelines for grounding procedures.
- Fuel Storage: Store fuel in approved containers in a cool, well-ventilated area, away from living spaces. Never store fuel near the generator while it’s running.
- Fire Safety: Keep a fire extinguisher nearby and know how to use it. Generator engines can get hot, and having a fire safety tool on hand is crucial.
- Carbon Monoxide Alarms: Install carbon monoxide alarms in your home, especially in sleeping areas. These detectors can provide early warnings if dangerous levels of carbon monoxide are detected.
- Turn Off Before Refueling: Always turn off the generator and let it cool down before refueling. Spilled fuel on hot engine parts can lead to fires.
- Extension Cords: Use only heavy-duty extension cords designed for outdoor use. Ensure they are in good condition and rated for the wattage of your generator.
- Regular Maintenance: Follow the manufacturer’s guidelines for maintenance. Regularly check oil levels, filters, and other components to keep the generator running smoothly.
Remember, prioritizing safety when using generators is essential for both your well-being and the longevity of your equipment.
Conclusion
In conclusion, knowing how to test a portable generator capacitor is a valuable skill for every generator owner. Regular maintenance and testing can help you identify and address potential issues before they become major problems. By following the steps outlined in this guide, you can ensure that your generator’s capacitor is functioning correctly, which is crucial for reliable and efficient operation.
Don’t wait until the next power outage to discover that your generator isn’t performing as it should. Take proactive steps to test and maintain your generator’s capacitor, and you’ll have peace of mind knowing that you’re prepared for any situation that comes your way.
References
- Performance and power management of droplets-based electricity generators
- Towards modelling and design of magnetostrictive electric generators
- Generating efficiency: economic and environmental regulation of public and private electricity generators in Spain
- Carbon monoxide poisoning from hurricane-associated use of portable generators–Florida, 2004
Frequently Asked Questions
What Is the Average Cost of a Portable Generator Capacitor?
The average cost of a portable generator capacitor can vary depending on repairing costs and installation fees; however, it is typically in the range of $30 – $100. Detailed knowledge and expertise are required for proper installation, making this an important investment for those seeking reliable power.
What Is the Best Way to Store a Portable Generator Capacitor?
The most effective way to store a portable generator capacitor is in a cool, dry place with adequate ventilation. It should be kept away from sources of fuel or fumes and the voltage output should be checked regularly to ensure maximum fuel efficiency.
Are There Any Safety Considerations When Testing a Portable Generator Capacitor?
Prior to testing a portable generator capacitor, proper precautions should be taken to ensure safety. To emphasize this point, one must diligently deploy the correct technique and take all suitable safety measures. A knowledgeable and thorough understanding of the procedure is paramount for success and the avoidance of potential dangers.
What Are the Benefits of Regularly Testing a Portable Generator Capacitor?
Regularly testing a portable generator capacitor can improve efficiency and reduce downtime by identifying potential issues early. This is beneficial for ensuring the stable functioning of the system, allowing it to operate with optimal performance.
How Often Should a Portable Generator Capacitor Be Tested?
To ensure a reliable power supply, portable generator capacitors should be tested every 3-4 months. By regularly testing capacitor ratings, one can easily detect any issues that may arise and help maintain the overall efficiency of the device. Testing is essential to ensure safety and performance, providing peace of mind for those who depend on it.
What happens when a capacitor goes bad on a generator?
A malfunctioning capacitor impacts the generator in two ways: it induces voltage into the rotor and regulates overall voltage. When the capacitor is defective, the generator exhibits a lower voltage output since it relies on the residual magnetism of the rotor, typically yielding around 2-5V.
Can a generator operate without a capacitor?
A fundamental component of a generator, the capacitor plays a crucial role in regulating power flow to ensure the production of clean and reliable energy. Its presence is necessary for exciting the alternator windings and mitigating voltage surges.
Should a capacitor have continuity?
A capacitor is a two-terminal passive electrical component, and capacitance characterizes its effect. Affirmatively, continuity is expected in a capacitor. When the capacitor is closed, it is considered to have continuity.