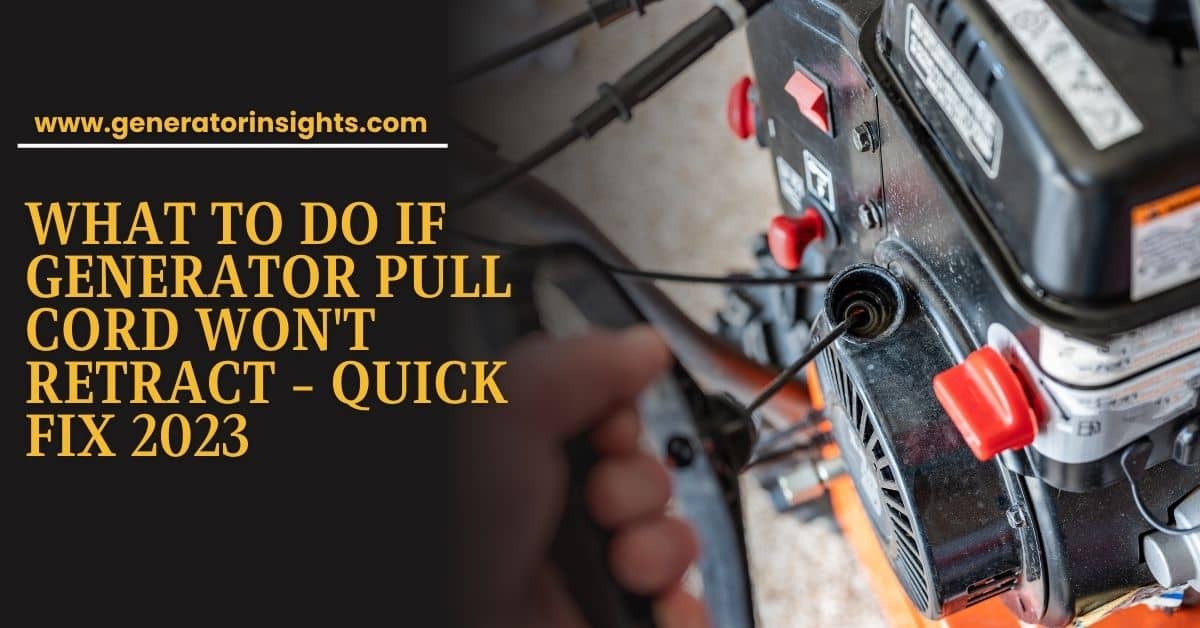
Frustration sets in when you’re ready to power up your generator, and the pull cord refuses to retract. It’s a common hiccup that many of us face. Picture this: you’re in the midst of a power outage, relying on your trusty generator to bring back the lights, and the cord seems to have a mind of its own. Don’t worry; you’re not alone in this dilemma.
In this guide, we’ll explore the reasons behind a stubborn pull cord and share some practical steps to ease your woes. Let’s unravel what to do if generator pull cord won’t retract, ensuring your generator is always ready to answer the call when the lights go out.
Jump to a Specific Section
- 1 Core Lessons
- 2 Why Won’t the Generator Pull Cord Retract?
- 3 What to Do if Generator Pull Cord Won’t Retract?
- 3.1 Clear Obstructions
- 3.2 Replace Worn Recoil Spring
- 3.3 Address Pull Cord Mechanism
- 3.4 Adjust Tension
- 3.5 Inspect Starter Assembly
- 3.6 Untangle the Cord
- 3.7 Lubricate Moving Parts
- 3.8 Thaw Frozen Components
- 3.9 Replace Worn Pull Cord
- 3.10 Verify Proper Cord Installation
- 3.11 Evaluate Engine Compression
- 3.12 Verify Fuel and Carburetor Functionality
- 3.13 Check Ignition System Components
- 3.14 Contact Manufacturer for Defects
- 3.15 Seek Professional Assistance if Needed
- 4 Generator Maintenance Tips
- 5 Generator Safety Tips
- 6 Conclusion
- 7 References
- 8 Frequently Asked Questions
- 8.1 How do I know if the recoil mechanism on my generator is faulty?
- 8.2 Can I use any type of lubricant on the recoil mechanism?
- 8.3 What are some common signs of a worn-out recoil spring?
- 8.4 Are there any specific safety precautions I should take when inspecting the recoil mechanism?
- 8.5 Is it possible to prevent damage to the generator’s recoil mechanism?
- 8.6 Why do you need to rewind a generator?
- 8.7 How much does it cost to rewind a generator?
Core Lessons
- Regular lubrication is important for the smooth operation of the pull cord and prevents stiffness or rustiness in the recoil spring.
- Regular cleaning is necessary to remove debris that can obstruct the movement of the pull cord and cause issues with retraction.
- Prioritizing regular maintenance and care for the pull cord helps ensure its functionality and avoids interference from faulty cords.
- Proactive measures, such as routine checks, debris removal, and proper handling, are key to preventing future problems and ensuring the longevity of the generator.
Why Won’t the Generator Pull Cord Retract?
Encountering difficulties with the generator pull cord not retracting? Various factors could contribute to this issue. Let’s explore the top 10 potential causes that might be hindering the smooth operation of your generator.
- Obstructions Around the Cord:
- Presence of debris, tangled wires, or foreign objects around the pull cord.
- Worn or Damaged Recoil Spring:
- The recoil spring responsible for retracting the cord may be showing signs of wear and tear.
- Issues with Pull Cord Mechanism:
- Wear and tear or misalignment in the pull cord mechanism.
- Incorrect Tension in the Pull Cord:
- The pull cord may have incorrect tension, affecting its retraction.
- Damage to Starter Assembly:
- Problems within the starter assembly, including the recoil housing.
- Entangled Cord:
- The pull cord itself might be tangled or caught on something.
- Lack of Lubrication:
- Insufficient lubrication in the pull cord mechanism causing friction.
- Frozen or Stiff Components:
- Extremely low temperatures may lead to frozen or stiff components, hindering movement.
- Wear on Pull Cord:
- The pull cord itself may show signs of wear, affecting its ability to retract.
- Verify Proper Cord Installation:
- If the pull cord is improperly installed, with issues such as incorrect attachment, knots, or misrouting, it can lead to difficulties in retraction.
- Evaluate Engine Compression:
- Engine compression issues, such as low compression due to worn piston rings, cylinder walls, or faulty valves, can result in increased resistance when pulling the cord, making retraction challenging.
- Verify Fuel and Carburetor Functionality:
- Insufficient fuel supply, contaminated fuel, clogged fuel lines, or carburetor-related problems can impact the engine’s ability to start and affect the pull cord retraction.
- Check Ignition System Components:
- Problems with ignition components, such as a fouled spark plug, damaged spark plug wire, malfunctioning ignition coil, or issues with the ignition switch, can lead to poor spark and difficulties in starting and cord retraction.
- Manufacturing Defects:
- Possible defects in the manufacturing of the pull cord or related components.
These potential causes should be examined systematically to identify the root of the problem and implement appropriate solutions.

What to Do if Generator Pull Cord Won’t Retract?
Encountering issues with a generator pull cord that won’t retract can be frustrating. Fortunately, many problems have straightforward solutions. Let’s explore what to do if you find yourself facing this situation.
- Clear Obstructions:
- Remove any debris, tangled wires, or foreign objects around the pull cord to ensure unobstructed movement.
- Replace Worn Recoil Spring:
- If the recoil spring is worn or damaged, consider replacing it to restore proper functionality.
- Address Pull Cord Mechanism:
- Lubricate or repair the pull cord mechanism to alleviate wear and tear or misalignment issues.
- Adjust Tension:
- Ensure the pull cord has the correct tension as per the manufacturer’s specifications. Adjust if necessary.
- Inspect Starter Assembly:
- Repair or replace damaged components within the starter assembly, including the recoil housing.
- Untangle the Cord:
- Carefully untangle the pull cord if it is caught on nearby objects or itself.
- Lubricate Moving Parts:
- Apply a suitable lubricant to the pull cord mechanism to reduce friction and promote smooth retraction.
- Thaw Frozen Components:
- If operating in cold temperatures, thaw frozen or stiff components using gentle heat to restore flexibility.
- Replace Worn Pull Cord:
- If the pull cord itself shows signs of wear, consider replacing it with a new one.
- Inspect Fuel and Carburetor Functionality:
- Verify that there is an adequate supply of clean fuel in the generator’s fuel tank.
- Check for any blockages, leaks, or damage in the fuel lines.
- Ensure proper carburetor adjustment and clean the carburetor if necessary.
- Evaluate Engine Compression:
- Position the piston at the top dead center (TDC) and check for resistance while pulling the cord.
- Perform a compression test to measure and compare compression readings.
- Inspect piston rings, cylinder walls, and valve seals for wear or damage.
- Verify Proper Cord Installation:
- Confirm that the pull cord is correctly attached to the recoil mechanism.
- Check for knots, tangles, or snags in the pull cord and untangle if needed.
- Ensure proper routing of the pull cord through any guide or pulley systems.
- Check Ignition System Components:
- Inspect the spark plug for fouling or wear, and clean or replace it as necessary.
- Examine the spark plug wire for damage and inspect the ignition coil for signs of corrosion.
- Verify the condition of the flywheel key and check the ignition switch for proper functioning.
- Contact Manufacturer for Defects:
- If you suspect manufacturing defects, reach out to the manufacturer for guidance or potential replacement parts.
By systematically addressing these solutions, you can troubleshoot and resolve the issue of a non-retracting generator pull cord effectively.

Now let’s discuss these points in detail.
Clear Obstructions
If you find that the generator pull cord won’t retract, the first step is to clear any obstructions that may be impeding its movement. Follow these steps to ensure a thorough resolution:
- Inspect the Surrounding Area: Begin by visually examining the area around the pull cord. Look for any debris, tangled wires, or foreign objects that might be obstructing the cord’s retraction.
- Remove Visible Obstructions: Carefully clear away any visible obstructions using your hands or appropriate tools. Be cautious not to damage the pull cord or any surrounding components.
- Check for Hidden Obstructions: Sometimes, obstructions may be less visible. Run your fingers along the length of the pull cord and the surrounding area to detect any hidden impediments.
- Use Compressed Air or a Soft Brush: If necessary, use compressed air or a soft brush to dislodge and remove finer debris that may be difficult to reach by hand.
- Verify Unobstructed Movement: After clearing the obstructions, gently pull and release the cord to ensure it now moves freely without any resistance.
By systematically following these steps, you can address and eliminate any obstructions that might be causing the generator pull cord not to retract. This initial step sets the foundation for identifying and resolving potential issues with the cord’s functionality.
Replace Worn Recoil Spring
If you’ve ruled out obstructions and your generator pull cord still won’t retract, the next step is to examine and replace a worn or damaged recoil spring. Follow these steps for a comprehensive resolution:
- Locate the Recoil Spring: Identify the location of the recoil spring within the pull cord mechanism. This is typically found in the housing near the cord’s point of attachment.
- Disconnect Spark Plug: As a safety precaution, disconnect the spark plug to prevent accidental engine starts during the replacement process.
- Access the Recoil Spring: Disassemble the housing or cover that encases the recoil spring. This may involve removing screws or bolts. Refer to the generator’s manual for specific instructions.
- Inspect the Recoil Spring: Carefully examine the recoil spring for any signs of wear and tear. Look for kinks, breaks, or deformation that may hinder its proper functioning.
- Purchase a Replacement Spring: If the recoil spring is damaged, purchase a replacement that matches the specifications outlined in the generator’s manual or contact the manufacturer for guidance.
- Install the New Recoil Spring: Follow the reverse steps of disassembly to install the new recoil spring securely. Ensure it is correctly positioned and engages with the pull cord.
- Reassemble the Housing: Put the housing or cover back in place, securing it with the appropriate screws or bolts. Ensure a snug fit to prevent any issues with the recoil spring.
- Reconnect the Spark Plug: Once the recoil spring is replaced and the housing is reassembled, reconnect the spark plug to restore power to the generator.
- Test the Pull Cord: Gently pull and release the cord to check if the new recoil spring allows for smooth and complete retraction.
By carefully following these steps, you can address issues related to a worn or damaged recoil spring, restoring the functionality of your generator’s pull cord.
Address Pull Cord Mechanism
If your generator pull cord still refuses to retract after ensuring there are no obstructions and replacing a worn recoil spring, it’s time to focus on the pull cord mechanism itself. Follow these steps to identify and address issues with the mechanism:
- Access the Pull Cord Mechanism:
- Begin by gaining access to the pull cord mechanism. This might involve removing covers or housing, so consult your generator’s manual for guidance.
- Examine for Wear and Tear:
- Inspect the pull cord and its housing for any signs of wear and tear. Look for frayed edges, knots, or misalignment that could hinder smooth retraction.
- Lubricate Moving Parts:
- Apply a suitable lubricant to the moving parts of the pull cord mechanism. This helps reduce friction and ensures smooth operation. Focus on areas where the cord interacts with other components.
- Check for Misalignment:
- Verify that all components of the pull cord mechanism are properly aligned. Misalignment can lead to resistance and difficulty in cord retraction.
- Tighten Loose Parts:
- If you notice any loose screws or bolts, tighten them to secure the pull cord mechanism. Loose components can contribute to malfunctions.
- Inspect Handle and Attachment Points:
- Examine the handle of the pull cord and its attachment points. Ensure there are no cracks or damages that may impede proper functioning.
- Test the Pull Cord:
- After lubricating and inspecting, gently pull and release the cord to check for improved retraction. The movement should be smooth and without any resistance.
- Repeat Lubrication as Needed:
- If issues persist, consider repeating the lubrication process after checking for any remaining sources of friction.
By addressing the pull cord mechanism in a systematic manner, you can identify and resolve issues that may be preventing the cord from retracting properly. This step is crucial in ensuring the overall functionality of the generator’s pull start mechanism.
Adjust Tension
When dealing with a generator pull cord that stubbornly refuses to retract, incorrect tension could be the culprit. Follow these steps to ensure that the pull cord has the correct tension for smooth retraction:
- Locate Tension Adjustment Points:
- Refer to your generator’s manual to identify the locations of tension adjustment points. These are typically found near the pull cord mechanism.
- Loosen Existing Tension:
- If the tension is too tight, carefully loosen it by turning the adjustment screws or knobs counterclockwise. This should provide some slack in the pull cord.
- Tighten Tension Gradually:
- On the other hand, if the tension is too loose, gradually tighten it by turning the adjustment screws or knobs clockwise. Make small adjustments until the desired tension is achieved.
- Refer to Manufacturer’s Specifications:
- Consult the manufacturer’s specifications in the manual for the recommended tension settings. Adhering to these guidelines ensures optimal performance and longevity of the pull cord.
- Test the Pull Cord:
- After making adjustments, gently pull and release the cord to test its retraction. The goal is to achieve a smooth and controlled movement without excessive resistance.
- Fine-Tune as Needed:
- If necessary, fine-tune the tension by making additional adjustments. It may take a few iterations to find the optimal balance.
- Verify Secure Fastening:
- Ensure that any adjustments made are accompanied by secure fastening of screws or knobs. Loose components can affect tension over time.
- Inspect for Any Wear:
- While adjusting tension, inspect the pull cord for signs of wear or damage. Address any issues promptly to prevent future retraction problems.
By systematically adjusting the tension of the pull cord according to the manufacturer’s specifications, you can resolve issues related to incorrect tension and promote smooth retraction, contributing to the overall functionality of your generator.
Inspect Starter Assembly
If your generator pull cord remains reluctant to retract even after addressing tension issues, it’s crucial to focus on the starter assembly. This includes components such as the recoil housing and other elements integral to the starting mechanism. Follow these steps to inspect and potentially resolve issues with the starter assembly:
- Disconnect Spark Plug:
- As a safety precaution, disconnect the spark plug to prevent any accidental starts during the inspection and potential repairs.
- Locate and Remove the Recoil Housing:
- Identify the recoil housing, typically positioned near the pull cord mechanism. Depending on your generator model, remove the housing cover by unscrewing bolts or screws.
- Inspect Recoil Housing:
- Examine the recoil housing for any signs of damage, misalignment, or worn components. Pay close attention to the mechanism that engages with the pull cord.
- Check Recoil Spring Connection:
- Ensure that the recoil spring is securely connected and functioning as intended. Any issues with the recoil spring can hinder the retraction of the pull cord.
- Examine Other Starter Components:
- Inspect additional components within the starter assembly. Look for damaged pulleys, starter dogs, or any other parts that may contribute to the retraction problem.
- Lubricate Moving Parts:
- Apply lubricant to moving parts within the starter assembly to reduce friction. This can enhance the overall functionality and ease of cord retraction.
- Replace Damaged Components:
- If you identify any damaged or worn components within the starter assembly, consider replacing them with compatible parts. Refer to the generator’s manual or consult the manufacturer for guidance.
- Reassemble the Recoil Housing:
- Once inspection and any necessary repairs or replacements are completed, securely reassemble the recoil housing, ensuring that all screws or bolts are tightened appropriately.
- Reconnect Spark Plug:
- Reconnect the spark plug to restore power to the generator, and ensure that all safety measures are followed.
By meticulously inspecting and addressing potential issues within the starter assembly, you can contribute to the efficient retraction of the generator pull cord, enhancing the overall functionality of your generator.
Untangle the Cord
If your generator pull cord is still refusing to retract, it’s time to investigate whether the cord itself is entangled or caught on something. Follow these steps to untangle the pull cord and ensure its smooth operation:
- Identify Tangled Areas:
- Carefully inspect the entire length of the pull cord, looking for any areas where it may be tangled or caught on nearby objects.
- Gently Loosen Knots:
- If you find knots or tangles, gently try to loosen them by pulling the cord in the opposite direction of the entanglement. Exercise caution to avoid causing further damage.
- Use Tools if Necessary:
- For more stubborn tangles, you may use appropriate tools such as pliers or a small hook to carefully untangle the cord. Take your time to avoid unnecessary force.
- Inspect Pull Cord Housing:
- Examine the housing or cover that encases the pull cord mechanism. Ensure there are no snags or points of friction that could contribute to entanglement.
- Remove Debris or Obstructions:
- Clear any debris or obstructions in the vicinity of the pull cord that might be contributing to entanglement. This could include leaves, twigs, or other foreign objects.
- Test Retraction:
- After untangling the pull cord, gently pull and release it to test for improved retraction. Ensure that the cord moves freely without any resistance.
- Inspect for Wear:
- While untangling, inspect the pull cord for signs of wear, fraying, or other damage. Address any visible issues promptly to prevent future retraction problems.
- Consider Cord Replacement:
- If the pull cord is significantly worn or damaged, consider replacing it with a new one. Refer to the generator’s manual for the correct specifications and replacement procedure.
By carefully untangling the pull cord and ensuring that it moves freely, you can eliminate potential sources of resistance and contribute to the effective retraction of the cord when starting your generator.
Lubricate Moving Parts
If your generator pull cord is still exhibiting retraction issues, the problem might be linked to insufficient lubrication in the pull cord mechanism. Follow these steps to address this concern and promote smooth operation:
- Identify Lubrication Points:
- Refer to your generator’s manual to identify specific points within the pull cord mechanism that require lubrication. Common areas include pivot points and moving components.
- Choose the Right Lubricant:
- Select a high-quality lubricant suitable for the pull cord mechanism. Ensure it is compatible with the materials used in the generator’s construction.
- Disconnect Spark Plug:
- As a safety precaution, disconnect the spark plug to prevent any accidental starts during the lubrication process.
- Apply Lubricant:
- Apply the selected lubricant to the designated points within the pull cord mechanism. Focus on areas where friction is likely to occur during cord retraction.
- Work the Pull Cord:
- Gently pull and release the cord several times to distribute the lubricant evenly across the moving parts. This helps in breaking down any existing friction.
- Reconnect Spark Plug:
- Once lubrication is complete, reconnect the spark plug to restore power to the generator. Ensure that all safety measures are followed.
- Test Retraction:
- After lubrication, test the pull cord by gently pulling and releasing it. The goal is to achieve smooth and effortless retraction.
- Regular Maintenance:
- Incorporate regular lubrication into your generator maintenance routine. Follow the manufacturer’s recommendations for the frequency of lubrication to prevent future retraction issues.
By addressing the lack of lubrication in the pull cord mechanism, you can significantly enhance its functionality, reduce friction, and contribute to a more efficient retraction process when starting your generator.
Thaw Frozen Components
In cold weather, generator components may become frozen or stiff, leading to difficulties in pull cord retraction. Follow these steps to address this issue and ensure your generator operates smoothly in low temperatures:
- Move the Generator to a Warmer Area:
- If possible, relocate the generator to a warmer environment before attempting to start it. This can help thaw any frozen components.
- Allow Time for Warming:
- Give the generator some time to acclimate to the warmer surroundings. This allows frozen or stiff components to thaw naturally.
- Use Gentle Heat:
- If the generator is still in a cold environment, use a gentle heat source such as a hairdryer or a heat gun (on low settings) to warm up the affected components. Be cautious not to apply excessive heat.
- Check the Pull Cord:
- After allowing sufficient time for warming, check the pull cord for flexibility. Gently pull and release the cord to ensure it moves freely without resistance.
- Inspect Other Components:
- Examine other components within the pull cord mechanism and starter assembly for signs of stiffness. Apply gentle heat as needed to facilitate thawing.
- Lubricate Components:
- Apply a suitable lubricant to the moving parts within the pull cord mechanism. This helps prevent future freezing and promotes smooth operation.
- Consider Cold-Weather Additives:
- In extremely cold climates, consider using cold-weather additives for the generator’s fuel. This can improve starting performance in low temperatures.
By addressing frozen or stiff components, you can ensure that your generator pull cord operates effectively even in cold weather conditions, providing reliable performance when needed.
Replace Worn Pull Cord
If your generator pull cord continues to exhibit retraction issues, it’s essential to inspect for wear on the pull cord itself. Follow these steps to identify and address any wear-related issues:
- Disconnect Spark Plug:
- As a safety precaution, disconnect the spark plug to prevent any accidental starts while working on the pull cord.
- Inspect the Pull Cord:
- Examine the entire length of the pull cord for signs of wear, fraying, or damage. Pay close attention to areas near the handle and the point of attachment to the recoil mechanism.
- Check for Knots:
- Untangle any knots or snags in the pull cord that may contribute to wear. Gently loosen knots to prevent further damage.
- Trim Frayed Ends:
- If you notice frayed ends on the pull cord, trim them with scissors or a sharp knife to create a clean, even edge. This prevents further unraveling.
- Evaluate Overall Condition:
- Assess the overall condition of the pull cord. If wear is extensive or there are multiple damaged sections, it may be advisable to replace the entire cord.
- Measure Cord Length:
- If replacing the pull cord, measure the length of the existing cord to ensure the new one is the appropriate size. Consult the generator’s manual for specifications.
- Purchase a Replacement Cord:
- Obtain a replacement pull cord from a reputable source or the generator’s manufacturer. Ensure it matches the specifications outlined in the manual.
- Attach the New Pull Cord:
- Follow the manufacturer’s guidelines for attaching the new pull cord to the recoil mechanism. Secure it tightly to prevent future issues.
- Reconnect Spark Plug:
- Once the new pull cord is in place, reconnect the spark plug to restore power to the generator. Ensure all safety measures are followed.
- Test Retraction:
- Gently pull and release the new cord to test its retraction. The movement should be smooth and without resistance.
By addressing wear on the pull cord and replacing it if necessary, you can ensure that the retraction mechanism operates efficiently, contributing to the overall reliability of your generator.
Verify Proper Cord Installation
In situations where the generator pull cord refuses to retract, it’s crucial to verify the proper installation of the pull cord. Follow these steps to ensure the cord is correctly set up for efficient retraction:
- Disconnect Spark Plug:
- Begin by disconnecting the spark plug for safety, preventing any accidental engine starts during the inspection.
- Access the Pull Cord Mechanism:
- Locate and access the pull cord mechanism. This may involve removing the cover or housing that encases the recoil assembly. Consult your generator’s manual for specific instructions.
- Inspect Cord Attachment:
- Examine how the pull cord is attached to the recoil mechanism. Ensure it is securely and properly fastened. Any loose or improperly attached cords can lead to retraction issues.
- Check for Knots or Tangles:
- Inspect the entire length of the pull cord for knots, tangles, or snags. Untangle the cord if necessary, ensuring it can move freely without any obstructions.
- Verify Cord Routing:
- Check that the pull cord is routed correctly through any guide or pulley systems. Ensure it follows the designated path outlined in the generator’s manual.
- Ensure Proper Tension:
- Confirm that the pull cord has the correct tension according to the manufacturer’s specifications. Adjust the tension if needed to ensure optimal functionality.
- Examine Handle Attachment:
- Inspect the handle attachment point. Ensure the handle is securely fastened to the pull cord and that there are no issues with the handle’s internal mechanism.
- Lubricate Moving Parts:
- Apply lubricant to moving parts within the pull cord mechanism. This helps reduce friction and ensures smooth operation during retraction.
- Test the Pull Cord:
- After verifying the proper installation, gently pull and release the cord to test for improved retraction. The movement should be smooth and without resistance.
- Reconnect Spark Plug:
- Once satisfied with the inspection and any necessary adjustments, reconnect the spark plug to restore power to the generator. Ensure all safety measures are followed.
By meticulously checking the installation of the pull cord and addressing any issues related to attachment, routing, or tension, you can contribute to the effective retraction of the cord, ensuring reliable starting of your generator.
Evaluate Engine Compression
If your generator pull cord won’t retract and you’ve ruled out issues with the cord itself, it’s essential to consider the possibility of engine compression problems. Follow these steps to evaluate and potentially address issues related to engine compression:
- Disconnect Spark Plug:
- Start by disconnecting the spark plug to ensure safety during the evaluation process.
- Position the Piston:
- Rotate the generator’s engine to position the piston at the top dead center (TDC) of its compression stroke. Consult your generator’s manual for guidance on how to achieve this for your specific model.
- Check for Resistance:
- Gently pull the pull cord while feeling for resistance. If there’s significant resistance or the cord feels unusually difficult to pull, it may indicate compression issues.
- Inspect Spark Plug Hole:
- Remove the spark plug and inspect the spark plug hole. If you notice excessive oil, carbon deposits, or other abnormalities, it could be a sign of compression-related problems.
- Perform a Compression Test:
- Use a compression tester to measure the compression in the engine cylinder. Follow the manufacturer’s specifications for the recommended compression range.
- Compare Compression Readings:
- Compare the compression readings to the manufacturer’s specifications. If the compression is significantly lower than recommended, it may indicate issues with the piston, cylinder, or valves.
- Inspect Piston Rings and Cylinder Walls:
- If possible, inspect the piston rings and cylinder walls for signs of wear or damage. Worn piston rings or cylinder walls can contribute to reduced compression.
- Check Valve Seals:
- Inspect the valve seals for proper seating. Damaged or improperly seated valve seals can lead to compression leaks.
- Address Engine Compression Issues:
- Depending on the findings, you may need to address specific engine components such as piston rings, cylinder walls, or valve seals. Professional assistance may be required for complex engine repairs.
- Reconnect Spark Plug:
- Once the evaluation is complete and any necessary repairs are made, reconnect the spark plug to restore power to the generator. Follow all safety measures during the process.
By evaluating engine compression, you can identify potential issues affecting the pull cord’s retraction. Addressing compression-related problems is crucial for maintaining the overall performance and reliability of your generator.
Verify Fuel and Carburetor Functionality
When facing challenges with a generator pull cord that won’t retract, it’s crucial to examine the fuel system and carburetor functionality. Follow these steps to ensure proper fuel supply and carburetor operation:
- Disconnect Spark Plug:
- Begin by disconnecting the spark plug to ensure safety during the inspection and any potential adjustments.
- Check Fuel Level:
- Verify that there is an adequate amount of fuel in the generator’s fuel tank. Insufficient fuel can lead to starting issues and impact the pull cord’s retraction.
- Inspect Fuel Quality:
- Examine the quality of the fuel. Stale or contaminated fuel can clog the carburetor and affect engine performance.
- Drain Old Fuel:
- If the fuel is old or contaminated, drain the fuel tank and replace it with fresh, clean fuel. Dispose of the old fuel properly.
- Check Fuel Lines:
- Inspect the fuel lines for any signs of damage, blockages, or leaks. Replace any compromised fuel lines.
- Verify Carburetor Adjustment:
- Ensure that the carburetor is properly adjusted. Refer to the generator’s manual for the correct carburetor settings and adjust them accordingly.
- Clean the Carburetor:
- If the carburetor is dirty or clogged, clean it thoroughly. Remove any debris, varnish, or deposits that may be obstructing fuel flow.
- Inspect the Choke:
- Check the choke for proper functioning. A malfunctioning choke can impact the air-fuel mixture and hinder the engine’s ability to start smoothly.
- Test Engine Starting:
- Attempt to start the generator and observe its behavior. If the engine starts more easily, it may indicate that fuel and carburetor adjustments have positively impacted the pull cord retraction.
- Reconnect Spark Plug:
- Once satisfied with the fuel and carburetor adjustments, reconnect the spark plug to restore power to the generator. Ensure all safety measures are followed.
By verifying the fuel system and ensuring proper carburetor functionality, you address potential issues that could impact the generator’s starting process and the pull cord’s retraction. Regular maintenance of the fuel system contributes to the overall reliability of your generator.
Check Ignition System Components
If the generator pull cord is still causing issues, it’s essential to examine the ignition system components. Follow these steps to check the ignition system and address potential problems:
- Disconnect Spark Plug:
- Start by disconnecting the spark plug to ensure safety during the inspection and adjustments.
- Inspect Spark Plug:
- Examine the spark plug for signs of fouling, wear, or deposits. A damaged or fouled spark plug can hinder proper ignition and affect the pull cord retraction.
- Clean or Replace Spark Plug:
- Clean the spark plug using a wire brush or replace it if necessary. Ensure the spark plug gap is set to the manufacturer’s specifications.
- Check Spark Plug Wire:
- Inspect the spark plug wire for any damage or wear. A damaged wire can result in a weak or inconsistent spark.
- Examine Ignition Coil:
- Inspect the ignition coil for visible signs of damage or corrosion. Ensure that all connections to the coil are secure.
- Verify Flywheel Key:
- Check the flywheel key for any signs of damage or shearing. A damaged key can cause the ignition timing to be off, affecting the engine’s ability to start smoothly.
- Inspect Ignition Switch:
- Check the ignition switch for proper functioning. If the switch is faulty, it may prevent the generator from starting and impact the pull cord retraction.
- Test Ignition System:
- Use an ignition tester or a spark plug tester to check for spark. If there’s no spark, it indicates a potential issue with the ignition system that needs to be addressed.
- Address Ignition System Issues:
- Depending on the findings, repair or replace components such as the spark plug, spark plug wire, ignition coil, flywheel key, or ignition switch as needed.
- Reconnect Spark Plug:
- Once the necessary adjustments or replacements are made, reconnect the spark plug to restore power to the generator. Follow all safety measures during the process.
By thoroughly examining and addressing potential issues within the ignition system, you contribute to the reliable starting of the generator and improve the functionality of the pull cord retraction.
Contact Manufacturer for Defects
If you’ve exhausted other troubleshooting steps and the generator pull cord still won’t retract, it’s essential to consider the possibility of manufacturing defects. Follow these steps to identify and address issues related to defects:
- Review the Generator’s Manual:
- Refer to the generator’s manual to understand the expected performance and specifications of the pull cord mechanism. This will help you identify any deviations from the intended design.
- Contact Manufacturer Support:
- Reach out to the manufacturer’s customer support or service department. Explain the issue you’re experiencing with the pull cord and inquire if there have been reported manufacturing defects or known issues.
- Provide Serial and Model Numbers:
- When contacting the manufacturer, have the generator’s serial and model numbers on hand. This information helps them identify the specific product and any potential manufacturing concerns.
- Describe the Issue in Detail:
- Clearly describe the problem with the pull cord, emphasizing that you’ve followed all recommended maintenance and troubleshooting steps outlined in the manual.
- Request Technical Assistance:
- Request technical assistance or guidance from the manufacturer’s support team. They may provide additional troubleshooting steps or recommend a course of action based on your specific situation.
- Check for Recalls:
- Inquire about any product recalls or known issues related to the generator model you own. Manufacturers occasionally issue recalls for products with identified defects.
- Follow Manufacturer’s Recommendations:
- Adhere to any recommendations or instructions provided by the manufacturer. This may involve sending the generator for inspection or, if applicable, taking advantage of warranty coverage.
- Consider Professional Inspection:
- If the generator is still under warranty, and the manufacturer recommends it, consider taking the generator to an authorized service center for professional inspection and potential repairs.
By actively engaging with the manufacturer and seeking their guidance on potential manufacturing defects, you can ensure that your generator pull cord operates as intended. If a defect is identified, the manufacturer’s support team will guide you on the appropriate steps to resolve the issue.
Seek Professional Assistance if Needed
Professional assistance should be sought if the process of replacing the recoil spring becomes difficult or if there is a lack of experience with generator repairs. Seeking help from a professional in such cases can save time and prevent further damage to the generator.
Troubleshooting steps may be necessary to identify the exact cause of the issue, and professionals are equipped with the knowledge and tools to perform these steps effectively.
When seeking professional assistance, it is important to choose a reputable technician or repair service that specializes in generator maintenance and repairs. They will have experience working with various types of generators and can provide accurate diagnoses and solutions.
Additionally, they may have access to specific replacement parts that may not be readily available for general consumers.
By seeking professional help, individuals can ensure that their generator pull cord issues are addressed efficiently and effectively. Once this problem has been resolved, it is important to consider preventive maintenance tips to avoid future issues.
These tips include regular cleaning, inspection, and lubrication of key components, as well as following manufacturer guidelines for maintenance schedules. By adhering to these preventive measures, individuals can prolong the lifespan of their generator and minimize the need for future repairs or replacements.
If interested you can read about is a power line conditioner for a generator worth it here. Moreover you can also read about stand by generator sizing here.
Generator Maintenance Tips
Ensuring your generator runs smoothly is crucial for uninterrupted power supply. Regular maintenance not only extends its lifespan but also prevents costly breakdowns. Here are essential tips to keep your generator in peak condition:
- Scheduled Inspections: Conduct thorough visual inspections every month, checking for loose wires, leaks, and any signs of wear and tear.
- Oil Level Check: Regularly monitor the oil levels. Low oil can lead to engine damage. Follow the manufacturer’s guidelines for the correct oil type and change intervals.
- Air Filter Replacement: Clean or replace the air filter as recommended by the manufacturer. A clogged filter reduces efficiency and can strain the generator.
- Fuel System Maintenance: Ensure the fuel system is clean and free of contaminants. Use a fuel stabilizer if the generator is not in frequent use to prevent fuel degradation.
- Battery Inspection: Check the battery terminals for corrosion and ensure they are tightly connected. Weak batteries can hinder starting and overall performance.
- Cooling System Care: Inspect the cooling system for debris and make sure the radiator fins are clean. Overheating can cause serious damage to the generator.
- Run the Generator Monthly: Even if there’s no power outage, run the generator for a short period each month. This keeps internal parts lubricated and ensures it’s ready when needed.
- Keep a Log: Maintain a maintenance log, noting each inspection, oil change, and part replacement. This log helps in tracking the generator’s health and aids in timely preventive measures.
Following these generator maintenance tips diligently ensures that your power backup system is reliable and ready to serve when required.
Generator Safety Tips
Generators are invaluable during power outages, but it’s crucial to prioritize safety. Follow these tips to ensure the proper and secure use of your generator:
- Outdoor Placement: Always operate your generator outdoors to prevent the buildup of harmful fumes. Maintain a safe distance from windows and doors.
- Ventilation: Adequate ventilation is essential. Keep the generator in an open space to disperse exhaust fumes and reduce the risk of carbon monoxide poisoning.
- Dry Environment: Place the generator on a dry surface to avoid electrical hazards. Keep it away from puddles or wet areas to prevent the risk of electric shock.
- Grounding: Properly ground the generator to reduce the risk of electric shock. Follow the manufacturer’s guidelines for grounding procedures.
- Fuel Storage: Store fuel in approved containers in a cool, well-ventilated area, away from living spaces. Never store fuel near the generator while it’s running.
- Fire Safety: Keep a fire extinguisher nearby and know how to use it. Generator engines can get hot, and having a fire safety tool on hand is crucial.
- Carbon Monoxide Alarms: Install carbon monoxide alarms in your home, especially in sleeping areas. These detectors can provide early warnings if dangerous levels of carbon monoxide are detected.
- Turn Off Before Refueling: Always turn off the generator and let it cool down before refueling. Spilled fuel on hot engine parts can lead to fires.
- Extension Cords: Use only heavy-duty extension cords designed for outdoor use. Ensure they are in good condition and rated for the wattage of your generator.
- Regular Maintenance: Follow the manufacturer’s guidelines for maintenance. Regularly check oil levels, filters, and other components to keep the generator running smoothly.
Remember, prioritizing safety when using generators is essential for both your well-being and the longevity of your equipment.
Conclusion
Our guide on What to Do If Generator Pull Cord Won’t Retract offers valuable insights into troubleshooting and fixing this common problem. By following the outlined steps and conducting a thorough inspection, you can get your generator back to optimal performance in no time. As a responsible generator owner, it’s essential to be equipped with troubleshooting skills to handle such situations efficiently. With the right approach and a little know-how, you can ensure that your generator continues to serve you reliably whenever the need arises.
References
- Electrical generators for large wind turbine: Trends and challenges
- Bio-inspired water-driven electricity generators: From fundamental mechanisms to practical applications
- Power electronic drives, controls, and electric generators for large wind turbines–an overview
- Stabilization of two electricity generators
Frequently Asked Questions
How do I know if the recoil mechanism on my generator is faulty?
Can the recoil mechanism be faulty? Learn how to fix a stuck generator pull cord and the necessary tools required for repair. Technical instructions, precision, and detailed steps will be provided to ensure success.
Can I use any type of lubricant on the recoil mechanism?
When it comes to lubricating the recoil mechanism of a generator, it is important to choose the appropriate lubricant options. Proper maintenance involves selecting a lubricant that is specifically designed for such mechanisms to ensure optimal functioning and longevity.
What are some common signs of a worn-out recoil spring?
Common signs of recoil spring damage include a pull cord that won’t retract, difficulty in starting the generator, and a loose or weak feeling when pulling the cord. Troubleshooting a stuck generator pull cord requires inspecting and replacing the worn-out recoil spring.
Are there any specific safety precautions I should take when inspecting the recoil mechanism?
When inspecting the generator recoil mechanism, it is important to follow safety precautions. Wear protective gloves and eyewear, ensure the generator is turned off, and disconnect the spark plug wire. Proper maintenance techniques include checking for any signs of wear or damage in the recoil spring and lubricating moving parts regularly.
Is it possible to prevent damage to the generator’s recoil mechanism?
Regular maintenance is crucial for preventing recoil mechanism damage in generators. By adhering to a proper maintenance schedule, including cleaning, lubricating, and inspecting the recoil mechanism, potential issues can be identified and addressed promptly, ensuring optimal performance and longevity of the generator.
Why do you need to rewind a generator?
Generator rewinding becomes necessary when restoring an older motor to its original efficiency, akin to its initial performance. The aging process affects the winding coils present in most, if not all, generators, leading to a decline in their effectiveness over time.
How much does it cost to rewind a generator?
The cost of generator rewinding typically ranges between $300 and $700 when hiring professionals. Periodic rewinding of electric motors is essential to maintain their reliability and efficiency in operation.