
Embarking on the journey of generator maintenance? Discovering the art of caring for your portable powerhouse is both empowering and essential. Ever wondered, in the hum of adventure or the calm of backup need, how to clean a portable generator? It’s not just a task; it’s a testament to reliability.
Picture this: your trusty generator standing resilient, powering through every storm or camping escapade. In this guide, we unravel the simplicity and importance of cleaning—ensuring your generator’s longevity and peak performance. Join us on this exploration where your generator isn’t just a machine; it’s a companion, deserving the finest care.
Jump to a Specific Section
- 1 Key Takeaways
- 2 How to Clean a Portable Generator?
- 3 Why You Need to Clean Your Dirty Generator?
- 4 What Would Happen if You Do Not Clean Your Generator?
- 5 How Often Should You Clean the Generator?
- 6 Generator Safety Tips
- 7 Conclusion
- 8 References
- 9 Frequently Asked Questions
- 9.1 How Often Should I Clean My Portable Generator?
- 9.2 Can I Use Any Cleaning Solution to Clean the Exterior Surfaces of the Generator?
- 9.3 Is It Necessary to Clean the Spark Plug if the Generator Is Running Smoothly?
- 9.4 Should I Drain the Fuel Tank Completely Before Cleaning It?
- 9.5 What Measures Should I Take to Ensure the Generator Is Stored Properly and Safely?
- 9.6 Where do you spray carb cleaner on a generator?
- 9.7 Is it okay to pressure wash a generator?
- 9.8 What can damage a portable generator?
Key Takeaways
- Disconnect the power source and allow the generator to cool down completely before starting maintenance work.
- Wear appropriate protective gear such as gloves, safety goggles, and a face mask.
- Choose a mild detergent or specialized cleaner safe for metal surfaces and gently scrub the exterior surfaces with a soft-bristle brush or sponge.
- Regularly clean the air filter, inspect the spark plug, and drain and refill the fuel tank for optimal performance and longevity.
How to Clean a Portable Generator?
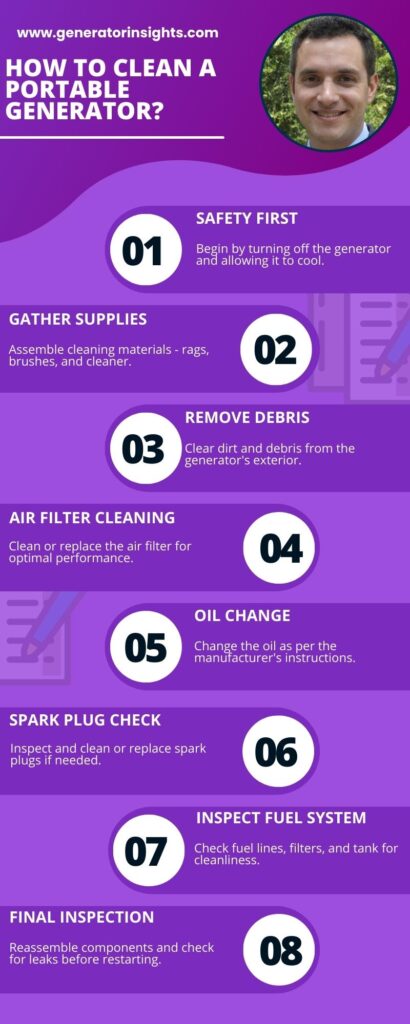
To clean a portable generator, follow these steps:
- Turn Off the Generator: Ensure the generator is switched off to avoid any electrical hazards.
- Let it Cool Down: Allow the generator to cool for at least 15-20 minutes before cleaning.
- Remove Debris: Use a brush or compressed air to remove loose debris from the exterior and ventilation areas. Pay special attention to the air intake and exhaust ports.
- Clean the Air Filter: Remove the air filter and clean it according to the manufacturer’s instructions. This may involve tapping it gently or using compressed air.
- Inspect Spark Arrestor: If your generator has a spark arrestor, remove it and clean it thoroughly. This helps prevent fires by catching sparks.
- Check Oil Level: Ensure the oil level is appropriate. If needed, top it up according to the manufacturer’s recommendations.
- Inspect Fuel System: Check for any leaks, and ensure the fuel lines and connections are secure.
- Clean the Fuel Tank: If there’s debris or sediment in the fuel tank, it’s crucial to clean it out.
- Inspect the Battery: If your generator has a battery, check its condition. Clean the terminals if they show signs of corrosion.
- Inspect and Tighten Connections: Check all electrical connections for signs of wear or looseness. Tighten them if necessary.
- Examine Belts and Hoses: Look for any cracks or signs of wear on belts and hoses. Replace if needed.
- Clean the Cooling System: Use a soft brush or compressed air to remove dust and debris from the cooling fins and radiator (if applicable).
- Inspect the Muffler: Check for any obstructions or signs of damage.
- Verify Control Panel: Ensure all switches, buttons, and controls are clean and functional.
- Reassemble and Test: Put back any removed components and conduct a brief test run to ensure everything is working correctly.
Remember to consult the manufacturer’s manual for specific instructions and safety precautions related to your portable generator model.
Now let’s discuss the whole process of cleaning a generator in detail.
Gather the Necessary Supplies
Before beginning the cleaning process, gather all the essential supplies and equipment needed to properly maintain and clean the portable generator. Having the right cleaning supplies and techniques is crucial to ensure a thorough and efficient cleaning.
First and foremost, you will need a set of protective gear to keep yourself safe while cleaning the generator. This includes gloves, safety goggles, and a dust mask to protect against any potential debris or harmful fumes.
Next, gather the necessary cleaning supplies. Start with a mild detergent or a specialized generator cleaner that is recommended by the manufacturer. Additionally, you’ll need a soft-bristle brush or a sponge for scrubbing away dirt and grime. A bucket or a container for mixing the cleaning solution will also be required.
To reach the difficult-to-clean areas, you may need a set of small brushes or pipe cleaners. These will help you clean the crevices and tight spots that are hard to reach.
Lastly, ensure that you have a clean and dry cloth or towel for drying the generator after cleaning.

Turn Off and Disconnect the Generator
To properly clean a portable generator, it is important to follow the correct procedure for turning off and disconnecting the equipment. This ensures safety and prevents any damage to the generator or yourself.
Here are three important steps to consider when disconnecting and shutting down your generator:
- Turn off the generator: Locate the power switch on the generator and switch it to the ‘off’ position. This will stop the generator from producing electricity and prevent any accidents during the cleaning process.
- Disconnect the spark plug wire: Carefully locate the spark plug wire, usually located near the engine, and gently pull it off the spark plug. This step is crucial to prevent accidental starts while cleaning the generator.
- Allow the generator to cool down: Generators can become hot during operation, so it is essential to let it cool down before proceeding with the cleaning process. This will prevent any burns or damage to the generator’s components.
Following these steps will ensure that your generator is safely disconnected and ready for cleaning.
Now, let’s move on to the next step, which is cleaning the exterior surfaces of the generator.
Clean the Exterior Surfaces of the Generator
Proper maintenance of your generator extends beyond its internal components; ensuring the cleanliness of its exterior surfaces is equally paramount. This routine not only contributes to the generator’s aesthetic appeal but also plays a crucial role in preventing corrosion, facilitating efficient heat dissipation, and ensuring overall longevity.
- Remove Debris:
- Begin by clearing away debris, including leaves, dirt, and branches, from around and atop the generator. Accumulated debris can obstruct vents and hinder proper ventilation, leading to potential overheating issues.
- Use a Soft Brush or Cloth:
- Employ a soft brush or cloth to gently wipe the surfaces of the generator. Avoid abrasive materials that could scratch or damage the finish. Pay special attention to delicate areas such as control panels and displays.
- Check for Rust:
- Inspect metal surfaces for any signs of rust or corrosion. If detected, utilize a rust inhibitor or a mixture of vinegar and water to clean and inhibit further corrosion. Consider employing a rust-resistant paint or coating for added protection.
- Inspect Vents and Openings:
- Ensure that all vents and openings are clear of obstructions. Any blockages can impede proper airflow, negatively impacting the generator’s cooling system. Utilize a vacuum or compressed air to thoroughly remove debris from these crucial areas.
- Clean the Fuel Tank:
- If your generator features an external fuel tank, make it a priority to clean it periodically. Introduce a fuel stabilizer to prevent varnish and gum buildup inside the tank, thus ensuring a consistently clean fuel supply to the generator.
- Apply a Protective Coating:
- Consider the application of a protective coating to metal surfaces post-cleaning. This serves as an additional barrier against rust and corrosion, particularly beneficial for generators exposed to harsh weather conditions.
- Inspect for Water Damage:
- Methodically check for any signs of water damage, particularly on electrical components. Moisture can lead to malfunctions and electrical issues. Wipe down any wet surfaces, and diligently address the source of water entry to prevent future problems.
- Example:
- For instance, generators located in coastal areas are more susceptible to salt-induced corrosion. In such environments, a more frequent and comprehensive cleaning regimen, along with the application of specialized protective measures, becomes imperative to maintain the generator’s structural integrity.
By diligently following these comprehensive steps and incorporating regular exterior cleaning into your generator maintenance routine, you not only enhance its visual appeal but also ensure that it remains in optimal condition, ready to deliver reliable power when needed.
Now, let’s move on to the next section, which discusses the importance of cleaning the air filter.
Cleaning the Air Filter
When cleaning a portable generator, it is important to inspect and maintain the air filter, as it plays a crucial role in preventing dust and debris from entering the engine. Proper air filter maintenance is essential for the generator to operate at its best and avoid potential damage. To ensure the air filter is functioning optimally, it is recommended to follow a regular cleaning schedule.
Cleaning the air filter involves removing it from the generator and inspecting it for any signs of dirt or clogging. If the filter appears dirty or obstructed, it should be cleaned or replaced. To clean the air filter, gently tap it to remove loose debris, then rinse it with warm water and mild detergent. Allow the filter to dry completely before reinstalling it.
Regularly cleaning the air filter is necessary, especially in dusty or dirty environments. Neglecting this maintenance task can lead to reduced performance and increased fuel consumption. Additionally, a clogged air filter can cause the engine to overheat and potentially suffer from premature wear and tear.
After cleaning the air filter, it is important to transition into the subsequent section about checking and cleaning the spark plug. This step ensures that all components of the portable generator are properly maintained for optimal performance.
Checking and Cleaning the Spark Plug
During the maintenance of a portable generator, it is crucial to inspect and clean the spark plug to ensure proper functioning and optimal performance. The spark plug plays a vital role in igniting the fuel-air mixture inside the combustion chamber, so it is essential to keep it in good condition. Here are three important steps to consider when checking and cleaning the spark plug:
- Inspect the spark plug: Start by removing the spark plug wire and using a spark plug wrench to carefully remove the spark plug from the engine. Examine the electrode and insulator for any signs of damage, such as excessive wear or deposits. A damaged spark plug may lead to misfires or even engine failure.
- Check the spark plug gap: Use a spark plug gap tool to measure the distance between the center and ground electrode. The correct gap ensures proper spark plug performance. Adjust the gap if necessary by carefully bending the ground electrode, but be cautious not to apply too much pressure or damage the spark plug.
- Replace the spark plug: If the spark plug is heavily damaged or worn, it is best to replace it with a new one. Refer to the generator’s manual for the recommended spark plug type and specifications. Install the new spark plug by hand-tightening it into the engine, and then use the spark plug wrench to give it a final snug.
Draining and Refilling the Fuel Tank
Ensuring the optimal performance of your generator involves regular maintenance, including the crucial task of draining and refilling the fuel tank. Here’s a step-by-step guide to help you navigate this essential process:
- Safety First: Before starting any maintenance, prioritize safety. Turn off the generator and allow it to cool before proceeding. Wear protective gear such as gloves and safety goggles to prevent any fuel contact.
- Locate the Fuel Tank: Identify the position of the fuel tank on your generator. This is typically situated near the engine and can vary in size depending on the generator’s capacity.
- Turn Off the Fuel Valve: Locate and turn off the fuel valve to prevent any fuel from flowing during the maintenance process. This step is crucial to avoid spills and ensure a safe working environment.
- Drain the Fuel Tank: Using a suitable container, carefully drain the remaining fuel from the tank. This can be done by opening the fuel tank’s drain valve or by disconnecting the fuel line and letting the fuel flow into the container.
- Dispose of Old Fuel Properly: Properly dispose of the drained fuel according to local regulations. Avoid environmental harm by using designated disposal methods or recycling facilities.
- Inspect the Fuel Tank: While the tank is empty, take the opportunity to inspect it for any signs of damage or corrosion. If issues are detected, address them before refilling.
- Refill with Fresh Fuel: Once the tank is empty and inspected, refill it with fresh, high-quality fuel. Ensure the fuel is compatible with your generator’s specifications and has not exceeded its shelf life.
- Turn On the Fuel Valve: After refilling the tank, turn the fuel valve back on. This allows fuel to flow to the engine when the generator is in operation.
- Run the Generator: Start the generator and let it run for a few minutes. This helps circulate the fresh fuel through the system and ensures the generator is ready for use.
- Monitor for Leaks: While the generator is running, monitor for any fuel leaks. If you detect a leak, immediately turn off the generator and address the issue before continuing.
- Record Maintenance Details: Keep a record of the maintenance performed, including the date of draining and refilling the fuel tank. This documentation aids in tracking the generator’s service history and planning future maintenance tasks.
Regularly draining and refilling the fuel tank is a fundamental aspect of generator maintenance, contributing to its longevity and reliable performance.
Storing the Generator Properly
Proper storage of your generator is crucial to ensure its longevity and reliable performance when needed. Whether it’s a portable generator or a standby unit, taking the right steps for storage is essential. Here’s a detailed guide in bullet points:
- Clean the Generator: Before storing, clean the generator thoroughly. Remove any dirt, debris, or grease that may have accumulated during use. A clean generator is less prone to corrosion and will function more efficiently.
- Inspect for Damage: Carefully inspect the generator for any signs of damage or wear. Check the fuel lines, electrical components, and the overall structure. Address any issues before storing to prevent them from worsening during idle periods.
- Change the Oil: Consider changing the oil before storing the generator. Used oil contains contaminants that can corrode engine components over time. Fresh oil provides better protection during periods of inactivity.
- Fuel System Considerations: If your generator uses gasoline, add a fuel stabilizer to the tank before storing. This helps prevent the formation of varnish and gum in the fuel system. For diesel or propane generators, ensure the fuel is clean and stored in appropriate containers.
- Run the Generator: If possible, run the generator for a short period before storing. This helps circulate fresh oil through the engine and ensures that all components are lubricated. It also burns off any remaining fuel in the carburetor, reducing the risk of clogs.
- Disconnect the Battery: If your generator has a battery, disconnect it before storage. This prevents the battery from draining during idle periods and extends its lifespan. Store the battery in a cool, dry place.
- Store in a Dry Location: Choose a dry and well-ventilated location for storing the generator. Exposure to moisture can lead to corrosion and damage electrical components. Consider using a generator cover to provide additional protection.
- Keep it Elevated: If possible, store the generator on a raised surface to prevent contact with moisture on the ground. This also facilitates air circulation, reducing the risk of rust and corrosion on the generator’s underside.
- Regular Maintenance Checks: Even in storage, conduct periodic checks on the generator. Ensure that all components are in good condition, and address any issues promptly. Regular maintenance contributes to a longer lifespan and reliable performance.
By following these guidelines, you can ensure your generator is stored properly, ready to provide reliable power when needed. Remember that each generator model may have specific storage recommendations, so consult the manufacturer’s guidelines for additional insights.
Why You Need to Clean Your Dirty Generator?
Generators play a pivotal role in providing reliable power during outages, making them indispensable in various settings. However, the maintenance aspect of these machines often takes a back seat. Neglecting the cleanliness of your generator can have detrimental effects on its performance and longevity.
Regular cleaning is not merely an aesthetic concern; it directly impacts the generator’s efficiency. Dirt, dust, and debris accumulation on the external surfaces can hinder proper ventilation, leading to overheating issues. The cooling system of a generator relies on unobstructed airflow, and a dirty exterior impedes this process, potentially causing the generator to overheat and malfunction.
Internally, a dirty air filter can compromise the generator’s ability to intake air, affecting the combustion process. This, in turn, reduces fuel efficiency and increases emissions. Routine cleaning of the air filter is essential to maintain optimal engine performance and minimize the environmental impact.
Moreover, neglecting the cleanliness of the generator’s fuel system can lead to clogs and corrosion. Contaminants in the fuel can result in inefficient combustion, affecting power output and potentially causing damage to internal components. Regular cleaning and fuel system maintenance are crucial for ensuring a steady and reliable power supply.
In areas prone to adverse weather conditions, a dirty generator becomes more susceptible to corrosion. The accumulation of moisture, salt, or other corrosive elements on the generator’s surfaces can accelerate wear and tear. This can compromise the structural integrity of the machine, leading to more frequent breakdowns and reducing its overall lifespan.
In conclusion, keeping your generator clean is not just a matter of appearance; it directly influences its functionality and longevity. Routine cleaning, including the external surfaces, air filter, and fuel system, is essential to ensure your generator operates efficiently when you need it the most. Regular maintenance can save you from unexpected failures and extend the life of your valuable power backup system.
What Would Happen if You Do Not Clean Your Generator?
Regular maintenance is crucial to ensuring the optimal performance and longevity of your generator. Neglecting to clean your generator can lead to a range of issues, affecting its efficiency and potentially causing long-term damage. Here’s a detailed breakdown of the consequences of not cleaning your generator:
| Issue | Consequence |
|---|---|
| Accumulation of Dirt and Debris | Without regular cleaning, dirt and debris can accumulate on the generator’s external surfaces and components. This accumulation may impede proper ventilation, leading to overheating and reduced performance. |
| Clogged Air Filters | Over time, the air filters of the generator can become clogged with dust and particles. This restricts the airflow to the engine, affecting combustion efficiency and potentially causing the generator to stall or perform poorly. |
| Reduced Cooling Efficiency | The generator’s cooling system, including the radiator and cooling fins, can become less effective when covered with dirt. This reduction in cooling efficiency may lead to overheating, posing a risk of damage to the engine. |
| Corrosion and Rust | Moisture and debris buildup on the generator’s surfaces can contribute to corrosion and rust. This not only affects the aesthetics but also compromises the structural integrity of the generator over time, potentially leading to leaks. |
| Fuel System Issues | Dirt and contaminants can find their way into the fuel system, causing blockages and affecting the generator’s fuel efficiency. This can result in erratic operation, engine misfires, and even damage to internal components. |
| Decreased Generator Lifespan | Continuous neglect of cleaning can contribute to a shortened lifespan of the generator. The combination of overheating, reduced efficiency, and increased wear and tear can lead to more frequent breakdowns and the need for premature replacements. |
Regularly cleaning your generator is a simple yet effective measure to prevent these issues, ensuring it remains reliable and efficient when you need it most.
How Often Should You Clean the Generator?
Your generator is a reliable source of power, especially during emergencies. To ensure it operates efficiently and maintains its longevity, regular cleaning is essential. The frequency of cleaning depends on various factors, and understanding these considerations will help you keep your generator in optimal condition.
Factors Influencing Cleaning Frequency:
- Operational Hours: The more your generator runs, the more frequently it will require cleaning. Generators used for extended periods, such as standby generators during power outages, may need more frequent cleaning than those used sporadically.
- Environmental Conditions: The environment in which your generator operates plays a significant role. If your generator is exposed to dusty or humid conditions, it may accumulate debris more quickly, necessitating more frequent cleaning. For example, generators in construction sites may require more frequent maintenance due to the dusty environment.
- Fuel Type: Different fuel types can leave residues that affect generator components. Diesel generators, for instance, may produce more soot than natural gas generators, requiring more frequent cleaning.
Recommended Cleaning Schedule:
- Regular Inspections: Conduct visual inspections of your generator at least once a month. Check for any visible dust, debris, or signs of corrosion. Address any issues promptly to prevent them from escalating.
- Air Filters: Check and clean or replace the air filters regularly, typically every 100 to 200 hours of operation, or as recommended by the manufacturer. Clean filters ensure optimal airflow, combustion, and overall generator performance.
- Cooling System: Inspect the cooling system regularly, ensuring that fins and radiator surfaces are clean and free from debris. Dirty cooling systems can lead to overheating and reduced efficiency.
- Fuel System: Monitor the fuel system and clean the fuel filters if necessary. Contaminated fuel can compromise the generator’s performance, so regular checks are crucial.
- Exhaust System: Inspect the exhaust system for any blockages or excessive carbon buildup. Clean the exhaust system as needed to prevent restrictions that could affect generator operation.
Generator Safety Tips
In times of power outages, generators offer a reliable backup, but ensuring safety is paramount. Follow these tips for secure operation:
- Outdoor Placement: Always place the generator outdoors to prevent carbon monoxide buildup. Keep it away from doors, windows, and vents.
- Ventilation: Ensure proper ventilation to dissipate exhaust gases. Generators produce carbon monoxide, a colorless and odorless gas that can be deadly if inhaled.
- Fuel Storage: Store fuel in approved containers, away from living spaces. Refuel when the generator is cool to avoid accidents.
- Grounding: Properly ground the generator to prevent electrical shock. Follow the manufacturer’s instructions for grounding procedures.
- Extension Cords: Use heavy-duty extension cords designed for outdoor use. Avoid overloading them to prevent fire hazards.
- Water and Electricity Don’t Mix: Operate the generator on dry surfaces and avoid exposure to rain or wet conditions to prevent electrical hazards.
- Regular Maintenance: Perform regular maintenance checks on the generator, including oil and filter changes, to ensure optimal performance.
- Cool Down Period: Allow the generator to cool down before refueling, reducing the risk of burns and fire.
- Carbon Monoxide Detectors: Install carbon monoxide detectors in your home to alert you to any dangerous levels of this gas.
- Keep Children and Pets Away: Create a safe zone around the generator and restrict access to children and pets to prevent accidents.
- Follow Manufacturer’s Guidelines: Always adhere to the manufacturer’s guidelines and instructions for your specific generator model.
Conclusion
In conclusion, “How to Clean a Portable Generator” is your go-to resource for maintaining the health and reliability of your generator. Regular cleaning and upkeep are vital to ensure it operates efficiently during emergencies and prolonged power outages. By following the cleaning and maintenance techniques outlined in this guide, you can enhance the longevity and performance of your generator, giving you peace of mind in times of need. So, don’t neglect this essential aspect of generator ownership. Incorporate these cleaning practices into your routine, and your portable generator will be a reliable source of power when you need it most.
References
- Development of micro power generators–a review
- Renewable energy systems with photovoltaic power generators: Operation and modeling
- High-power generators for offshore wind turbines
- Nationwide assessment of potential output from wind-powered generators
Frequently Asked Questions
How Often Should I Clean My Portable Generator?
Regular maintenance and cleaning of a portable generator is crucial for optimal performance and longevity. To ensure the best results, it is recommended to clean your portable generator at least once every six months using the appropriate cleaning methods and techniques.
Can I Use Any Cleaning Solution to Clean the Exterior Surfaces of the Generator?
When cleaning the exterior surfaces of a portable generator, it is important to use a cleaning solution that is safe and effective. While there are alternatives available, it is best to follow the manufacturer’s recommendations for the best practices in cleaning.
Is It Necessary to Clean the Spark Plug if the Generator Is Running Smoothly?
Regular maintenance of a portable generator includes cleaning the spark plug, regardless of whether it is running smoothly or not. This is important to ensure optimal performance and prevent potential issues in the future.
Should I Drain the Fuel Tank Completely Before Cleaning It?
While it is not necessary to drain the fuel tank completely before cleaning, it is recommended to minimize the risk of fuel spillage during the cleaning process. Proper fuel storage and disposal should be followed to ensure safety.
What Measures Should I Take to Ensure the Generator Is Stored Properly and Safely?
When it comes to generator maintenance and storage, it is crucial to take appropriate measures to ensure proper functioning and safety. This includes proper cleaning, regular inspection, and adequate storage conditions for the generator.
Where do you spray carb cleaner on a generator?
Spray carb cleaner into the aperture from which the carb nozzle was removed. A thin piece of wire or needle can be used to dislodge any debris from the nozzle aperture. Ensure that carb cleaner flows freely into the carb chamber.
Is it okay to pressure wash a generator?
It is not recommended to use a pressure washer on a generator. While cleaning the engine is essential to remove dirt and identify potential issues, using a pressure washer can cause more harm than good.
What can damage a portable generator?
Damages may occur if power is restored while the generator is backfeeding. To avoid this, always keep the generator power and the electrical system isolated from each other. Ensure the generator is disconnected before power is restored to prevent severe damage.