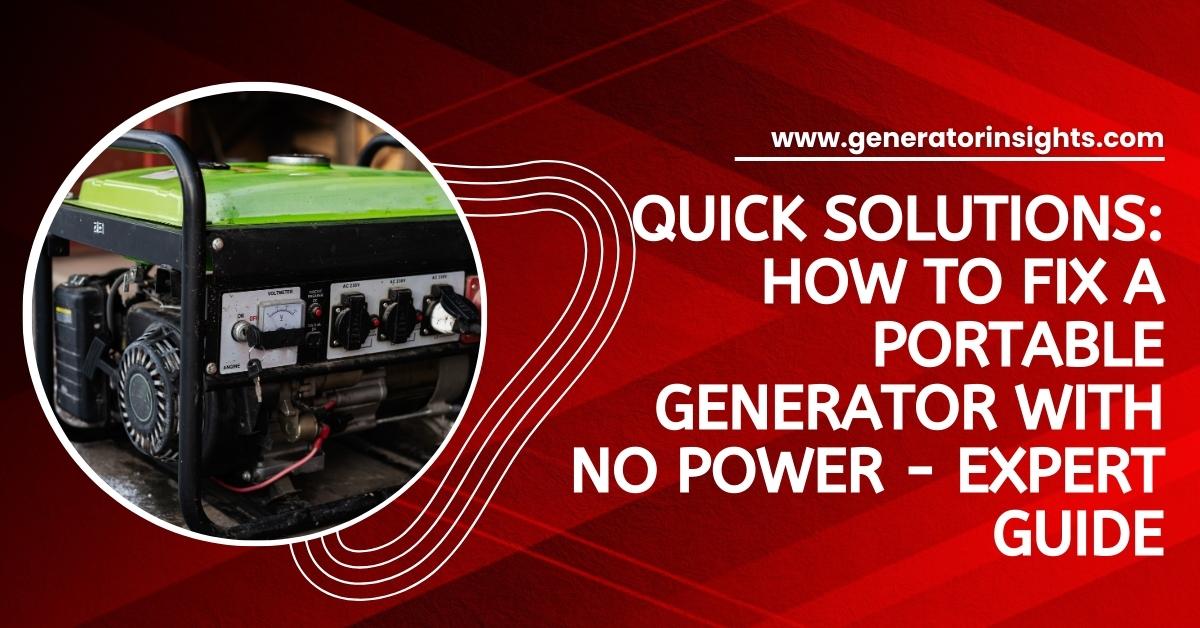
Imagine you’re in the midst of a power outage, relying on your trusty portable generator to bring light and warmth to your surroundings, only to find it silent and unresponsive. It’s a common scenario that can leave you feeling helpless. But fear not, as we dive into the essential guide on How to Fix a Portable Generator With No Power.
We understand the frustration and urgency you might be experiencing, and we’re here to empower you with practical solutions. Let’s unravel the mystery behind a silent generator, exploring steps that not only bring your power source back to life but also put you back in control of your electricity needs.
Jump to a Specific Section
- 1 Core Insights
- 2 What are the Reasons of a Running Generator not Producing Power?
- 3 How to Fix a Portable Generator With No Power?
- 3.1 Loss of Residual Magnetism
- 3.2 Fuel Issues
- 3.3 Ignition System Problems
- 3.3.1 1. Identify Faulty Spark Plugs
- 3.3.2 2. Gather Necessary Tools and Replacement Parts
- 3.3.3 3. Prepare the Generator
- 3.3.4 4. Remove Old Spark Plugs
- 3.3.5 5. Install New Spark Plugs
- 3.3.6 6. Conduct Regular Ignition System Maintenance
- 3.3.7 7. Replace Malfunctioning Ignition Coils
- 3.3.8 8. Test the Generator
- 3.3.9 9. Regular Maintenance Schedule
- 3.4 Troubleshooting the Circuit Breaker
- 3.5 Air Intake Blockages
- 3.6 Engine Mechanical Problems
- 3.7 Generator Head Issues
- 3.8 Testing the Battery
- 3.9 Seeking Professional Help
- 4 Troubleshooting Common Generator Issues
- 5 Generator Maintenance Tips
- 6 Conclusion
- 7 References
- 8 Frequently Asked Questions
- 8.1 Can I Use My Portable Generator Indoors?
- 8.2 How Often Should I Change the Oil in My Portable Generator?
- 8.3 Can I Connect My Portable Generator Directly to My Home’s Electrical System?
- 8.4 What Kind of Fuel Should I Use for My Portable Generator?
- 8.5 Can I Run My Portable Generator Continuously for an Extended Period of Time?
- 8.6 What causes a portable generator to not produce power?
- 8.7 Why is there no power when the generator is running?
- 8.8 How do you restore a generator’s power when it has lost residual magnetism?
Core Insights
- Fuel-related issues such as insufficient fuel supply and clogged fuel filters can cause a portable generator to have no power.
- Faulty spark plugs, either worn-out or improperly gapped, should be inspected and cleaned regularly to maintain generator performance.
- Battery testing is important to ensure the battery’s voltage is sufficient, and loose or corroded connections should be addressed.
- Circuit breaker troubleshooting involves checking electrical connections, inspecting the circuit breaker for damage, and testing for continuity. Resetting or replacing the circuit breaker may be necessary to fix power issues.
What are the Reasons of a Running Generator not Producing Power?
When your generator runs but fails to produce power, several underlying factors might be at play. It’s crucial to identify these issues promptly to ensure your generator functions optimally. Here are potential causes for this concern:
- Fuel Issues:
- Insufficient or contaminated fuel can hinder power generation.
- Clogged fuel filters may restrict the flow of fuel to the engine.
- Loss of Residual Magnetism:
- The generator may lose its residual magnetism over time, hindering the production of electricity.
- Factors like extended periods of inactivity or certain electrical faults can contribute to the demagnetization of the generator.
- Ignition System Problems:
- Faulty spark plugs may disrupt the combustion process.
- Ignition system malfunctions, such as a defective ignition coil, could lead to power generation issues.
- Circuit Breaker Problems:
- Tripped circuit breakers can interrupt the flow of electricity.
- Overloaded circuits might cause the circuit breaker to trip repeatedly.
- Battery Issues:
- A dead or weak battery can affect the starting mechanism.
- Corroded battery terminals may hinder the electrical connection.
- Air Intake Blockages:
- Restricted air intake due to debris or blockages can impede combustion.
- Dirty air filters may reduce the airflow needed for proper engine function.
- Engine Mechanical Problems:
- Worn-out piston rings or cylinder walls may result in insufficient compression.
- Timing belt issues can affect the synchronization of engine components.
- Generator Head Issues:
- Damaged or worn-out brushes in the generator head can lead to a lack of power generation.
- Faulty voltage regulators may impact the proper distribution of electrical output.
How to Fix a Portable Generator With No Power?
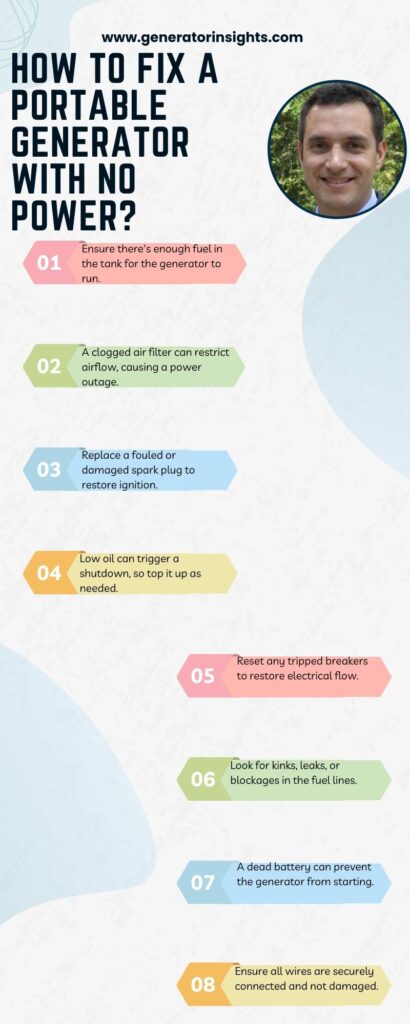
Fixing a portable generator with no power requires a systematic approach:
- Fuel Issues:
- Ensure the fuel supply is clean and of the correct type.
- Regularly replace fuel filters to maintain an unobstructed fuel flow.
- Loss of Residual Magnetism:
- Re-establish residual magnetism by using a process called “flashing.” This involves momentarily applying a low voltage to the generator’s field winding to restore magnetic strength.
- Ignition System Problems:
- Replace faulty spark plugs with the appropriate ones for your generator.
- Conduct regular maintenance on the ignition system, addressing issues like a malfunctioning ignition coil.
- Circuit Breaker Problems:
- Identify the cause of the circuit breaker tripping and address it.
- Avoid overloading circuits to prevent frequent tripping.
- Battery Issues:
- Charge or replace a dead or weak battery.
- Clean corroded battery terminals and ensure a secure connection.
- Air Intake Blockages:
- Clear any debris obstructing the air intake system.
- Replace or clean air filters to ensure proper airflow to the engine.
- Engine Mechanical Problems:
- Address worn-out piston rings or cylinder walls through engine repair or replacement.
- If the timing belt is damaged, promptly replace it to restore proper engine timing.
- Generator Head Issues:
- Replace damaged brushes in the generator head.
- Address voltage regulator malfunctions by replacing the faulty component.
Now let’s discuss these fixes in detail.
Loss of Residual Magnetism
Fortunately, there are two methods of restoring residual magnetism to the generator and getting it back up and running – the 12 Volt Generator Battery Method or the Electric Drill Method. In this article, we’ll look at these methods in detail so you can quickly get your generator back to functioning properly.
12 Volt Generator Battery Method
To fix a generator not producing power, you’ll need to use the volt generator battery method: unplug the two wires connecting to the generator brushes, connect one of those to the ground battery terminal, and plug in a light. Here’s what this step-by-step process looks like:
| Step | Description |
|---|---|
| Unplug two wires | Unplug the two wires that connect to the generator brushes. One is red and the other is black or white. |
| Connect one wire to ground terminal | Connect the black or white wire to your generator ground battery terminal. |
| Plug in a light & turn on switch/breaker | Plug in a light and turn on your generator breaker or switch and start the motor. |
| Connect battery +12 volts (red cable) for 3 secs | Connect your battery +12 volts (red cable) to the red wire on removed terminals for three seconds. |
| Replace plug & finish up | Remove your wires and replace the plug; your generator should now be producing power again! |
Once you’ve completed these steps using the volt generator battery method, you’re ready to move onto fixing it with an electric drill.
Electric Drill Method
Plugging in an electric drill to the generator receptacle and switching the direction to forward can help excite the field, allowing the generator to produce electricity. To do this, depress the trigger on the drill while spinning it in reverse.
This process will kick start a generator that is not producing power. Once finished, releasing the trigger and turning off the generator will ensure everything is running properly. With this method, you can easily fix a generator not producing power without having to replace any parts or hire a professional.
Fuel Issues
Ensure the Fuel Supply is Clean
- Inspect Fuel Quality:
- Begin by visually inspecting the fuel in the generator’s tank.
- Ensure the fuel is clean, free from debris, and matches the recommended type specified in the generator’s manual.
- Drain Old Fuel if Necessary:
- If the fuel is old or contaminated, drain the tank completely.
- Dispose of the old fuel properly according to environmental regulations.
- Refill with Clean, Recommended Fuel:
- Fill the tank with fresh, clean fuel of the correct type.
- Use a clean and approved container to avoid introducing impurities into the fuel system.
- Check Fuel Lines:
- Inspect fuel lines for any signs of damage, leaks, or blockages.
- Replace damaged or leaking fuel lines promptly.
Regularly Replace Fuel Filters
- Locate the Fuel Filter:
- Consult the generator’s manual to locate the fuel filter. It is typically situated in the fuel line between the tank and the engine.
- Turn Off the Generator:
- Before attempting to replace the fuel filter, turn off the generator and allow it to cool.
- Release Pressure:
- If your generator has a pressure release valve, activate it to release any pressure in the fuel system.
- Remove the Old Fuel Filter:
- Disconnect the fuel lines connected to the filter.
- Carefully remove the old fuel filter, taking note of the direction of fuel flow.
- Install the New Fuel Filter:
- Install a new, compatible fuel filter in the correct orientation.
- Reconnect the fuel lines, ensuring a secure fit.
- Prime the Fuel System:
- If your generator requires priming after filter replacement, follow the manufacturer’s instructions to prime the fuel system.
- Restart the Generator:
- Turn the generator back on and monitor for any signs of improved performance.
Regular maintenance, including monitoring fuel quality and replacing fuel filters, is essential for the longevity and optimal performance of your generator. Always refer to the manufacturer’s guidelines for specific details related to your generator model. If issues persist, consult a professional for further diagnosis and repair.
Ignition System Problems
1. Identify Faulty Spark Plugs
- Visual Inspection: Examine the spark plugs for signs of wear, damage, or carbon buildup.
- Check Spark Plug Gap: Ensure the spark plug gap is within the manufacturer’s specifications.
2. Gather Necessary Tools and Replacement Parts
- Tools: You may need a socket wrench, spark plug socket, and a gap gauge.
- Replacement Spark Plugs: Obtain the correct spark plugs compatible with your generator model.
3. Prepare the Generator
- Turn Off the Generator: Ensure the generator is powered off to guarantee safety during the replacement process.
- Locate the Spark Plugs: Identify the location of the spark plugs on your generator.
4. Remove Old Spark Plugs
- Use a Socket Wrench: Loosen and remove the old spark plugs carefully.
- Inspect Threads: Check the threads for any signs of damage.
5. Install New Spark Plugs
- Check Gap: Confirm the gap of the new spark plugs matches the manufacturer’s specifications.
- Hand Tighten: Carefully thread the new spark plugs into place by hand to avoid cross-threading.
- Use Socket Wrench: Use the socket wrench to tighten the spark plugs snugly.
6. Conduct Regular Ignition System Maintenance
- Inspect Ignition Coils: Check for visible signs of damage, such as cracks or corrosion.
- Measure Resistance: Use a multimeter to measure the resistance of the ignition coils, comparing the readings to the manufacturer’s specifications.
7. Replace Malfunctioning Ignition Coils
- Acquire Replacement Coils: Obtain replacement ignition coils if the existing ones are malfunctioning.
- Follow Manufacturer Guidelines: Adhere to the manufacturer’s guidelines for proper installation.
- Securely Attach Coils: Ensure the new ignition coils are securely attached, and all electrical connections are properly made.
8. Test the Generator
- Power On: Start the generator and observe its performance.
- Check for Sparks: Verify that sparks are present at the spark plug electrodes during startup.
9. Regular Maintenance Schedule
- Establish Routine Checks: Implement a regular maintenance schedule, including spark plug inspection and replacement as needed.
- Address Issues Promptly: If issues arise, address them promptly to prevent further damage to the ignition system.
By following these steps, you can effectively address ignition system problems in your generator, ensuring proper spark plug function and maintaining the overall reliability of the system.
Troubleshooting the Circuit Breaker
Troubleshooting the circuit breaker involves examining the electrical connections and testing for any faults or malfunctions that could be causing a disruption in the power supply. To effectively troubleshoot the power output of a portable generator and identify issues with the circuit breaker, follow these steps:
- Check the electrical connections: Ensure that all wires and cables are securely connected to their respective terminals. Loose or damaged connections can lead to a loss of power.
- Inspect for physical damage: Visually inspect the circuit breaker for any signs of physical damage such as cracks, burns, or melted components. Such damages can indicate a fault in the system.
- Test for continuity: Use a multimeter set to continuity mode to check if electricity is flowing through the circuit breaker when it is switched on. If there is no continuity, it may need replacement.
- Reset or replace: If you have identified an issue with the circuit breaker, try resetting it by switching it off and then back on again. If this doesn’t resolve the problem, consider replacing it with a new one.
Air Intake Blockages
Step 1: Inspection
Start by turning off the generator and allowing it to cool down. Then, visually inspect the air intake system for any visible debris or blockages. This includes checking the air intake grills, ducts, and the area surrounding the air filter.
Step 2: Remove External Debris
Use a soft brush or compressed air to gently remove any loose debris, leaves, or dirt that may be obstructing the air intake. Be cautious not to push debris further into the system.
Step 3: Air Filter Examination
Access the air filter housing and inspect the air filter. If the filter is visibly dirty or clogged, it’s essential to clean or replace it.
Step 4: Cleaning the Air Filter
If the air filter is reusable, carefully remove it and clean it according to the manufacturer’s instructions. This often involves tapping it to remove loose dirt or washing it with mild soap and water. Ensure the filter is completely dry before reinstalling.
Step 5: Replacement
If the air filter is not reusable or is damaged, replace it with a new one. Make sure to use the recommended type of air filter specified in your generator’s manual.
Step 6: Reassembly
Once the air intake system is free from debris and the air filter is either cleaned or replaced, reassemble the components carefully. Ensure that all parts are securely in place.
Step 7: Test Run
Start the generator and observe its performance. Check for any unusual sounds or signs of obstruction. If the generator now produces power as expected, the air intake blockage issue has likely been resolved.
Engine Mechanical Problems
1. Worn-out Piston Rings or Cylinder Walls:
- Step 1: Diagnosis
- Perform a compression test to identify low compression levels, indicating potential issues with piston rings or cylinder walls.
- Step 2: Remove Cylinder Head
- Disconnect the battery to ensure safety.
- Remove the cylinder head to access the pistons and cylinders.
- Step 3: Inspection
- Examine the piston rings and cylinder walls for wear, scoring, or damage.
- Measure cylinder bore diameter to determine if it’s within acceptable tolerances.
- Step 4: Repair or Replace
- If wear is minimal, honing the cylinders may suffice.
- Extensive damage may require cylinder re-sleeving or engine replacement.
- Step 5: Reassembly
- Reassemble the engine, ensuring proper torque settings for bolts.
- Install a new head gasket during reassembly.
2. Damaged Timing Belt:
- Step 1: Visual Inspection
- Locate the timing belt and inspect it for visible signs of wear, fraying, or damage.
- Step 2: Disconnect Components
- Disconnect the negative battery terminal.
- Remove components blocking access to the timing belt, such as the drive belts and covers.
- Step 3: Remove the Old Belt
- Align timing marks to ensure proper engine timing.
- Remove the old timing belt, taking note of the orientation and positioning of components.
- Step 4: Install the New Belt
- Carefully install the new timing belt, following the manufacturer’s guidelines.
- Ensure proper tension and alignment as specified in the vehicle manual.
- Step 5: Reassemble Components
- Reinstall components previously removed, such as drive belts and covers.
- Reconnect the negative battery terminal.
- Step 6: Test Run
- Start the engine and monitor for any unusual noises or vibrations.
- Verify that the engine operates smoothly and maintains proper timing.
These steps should be executed with precision and attention to detail. If you are not familiar with engine mechanics, it is advisable to seek professional assistance to ensure the correct diagnosis and implementation of the necessary repairs.
Generator Head Issues
1. Replacing Damaged Brushes in the Generator Head:
- Step 1: Safety First Ensure the generator is turned off and disconnected from the power source. Safety should always be the priority when working on any electrical equipment.
- Step 2: Access the Generator Head Locate the generator head, typically positioned at the end of the generator opposite the control panel. Remove any covers or panels obstructing access.
- Step 3: Identify and Remove Brushes Locate the brushes, which are typically rectangular components with conductive material. Carefully remove them from their holders, taking note of their orientation.
- Step 4: Inspect for Damage Thoroughly examine each brush for signs of wear, damage, or excessive wear. If a brush is worn down or damaged, it needs replacement.
- Step 5: Install New Brushes Install replacement brushes in the same orientation as the removed ones. Ensure a secure fit, and double-check that they make proper contact with the slip rings.
- Step 6: Reassemble and Test Reassemble any parts you removed to access the brushes. Turn on the generator and check if the power output is restored. If the issue persists, further investigation may be necessary.
2. Addressing Voltage Regulator Malfunctions:
- Step 1: Turn Off the Generator Ensure the generator is turned off and disconnected from the power source before attempting any repairs.
- Step 2: Locate the Voltage Regulator The voltage regulator is often located near the generator head or within the control panel. Identify and access the regulator.
- Step 3: Disconnect Power Disconnect any power sources to the voltage regulator to prevent electrical shocks during the replacement process.
- Step 4: Remove the Faulty Regulator Carefully detach the faulty voltage regulator from its mounting. Take note of the wiring connections to ensure correct reassembly.
- Step 5: Install the New Voltage Regulator Connect the new voltage regulator following the manufacturer’s instructions. Ensure all wires are correctly attached and secure.
- Step 6: Test the Generator Turn on the generator and monitor the power output. Check for stable voltage levels and ensure the generator is now producing power consistently.
Always refer to the generator’s manual for specific instructions related to your model, and if you are uncertain about any steps, seek professional assistance.
Testing the Battery
One method to diagnose the issue of a portable generator with no power is by conducting a thorough examination and assessment of the battery’s functionality. Testing battery life and troubleshooting battery connections are crucial steps in determining if the battery is the cause of the problem.
To test the battery, you can use a multimeter to measure its voltage. A fully charged 12-volt battery should read around 12.6 volts. If it reads significantly lower, it may be time to replace or recharge the battery.
Another aspect to consider is checking for loose or corroded connections between the battery and generator. Corrosion can impede proper electrical flow, resulting in a loss of power. Ensure that all connections are clean and tight.
In order to facilitate understanding, let us present this information in a table format:
| Steps | Description |
|---|---|
| Test Battery Life | Use a multimeter to measure voltage; 12-volt should read ~12.6 volts |
| Troubleshoot Battery Connection | Check for loose or corroded connections between battery and generator |
Seeking Professional Help
Seeking professional assistance can be a viable option for individuals who are unsure about how to clean their carburetor or troubleshoot any issues they may encounter. Professional help ensures that the generator is properly maintained and any problems are addressed effectively. Here are four reasons why seeking professional help for DIY generator maintenance is beneficial:
- Expertise: Professionals have extensive knowledge and experience in dealing with generators. They possess the necessary skills to diagnose and fix common generator problems accurately.
- Time-saving: By hiring professionals, individuals can save valuable time that would otherwise be spent on learning about generators, troubleshooting issues, and performing maintenance tasks.
- Safety: Generators involve complex electrical systems that require careful handling. Professionals follow safety protocols to minimize risks associated with handling generators, ensuring personal safety as well as preventing damage to the equipment.
- Long-term cost savings: With regular professional maintenance, potential problems can be identified early on and fixed before they escalate into major issues requiring expensive repairs or replacements.
Troubleshooting Common Generator Issues
Generators are indispensable during power outages, ensuring a continuous power supply. However, users may encounter issues that hinder their optimal performance. Below is a comprehensive guide to troubleshoot common generator issues and restore seamless operation.
| Issue | Symptoms | Troubleshooting Steps |
|---|---|---|
| 1. Engine Fails to Start | – Silent operation | – Check fuel levels and ensure there’s an adequate supply. |
| – Starter motor cranks but fails to ignite | – Inspect the spark plug for signs of damage or wear. Replace if necessary. | |
| – Strong smell of gasoline | – Examine the carburetor for blockages and clean or replace if needed. | |
| 2. Low Power Output | – Dimming lights and fluctuating power output | – Verify the load capacity and ensure it doesn’t exceed the generator’s limit. |
| – Appliances not running at full capacity | – Inspect the voltage regulator for malfunctions and replace if necessary. | |
| 3. Generator Overheating | – Unusual heat emanating from the generator | – Check the cooling system, including the radiator and coolant levels. Clean or replace components as required. |
| – Frequent shutdowns due to overheating | – Ensure proper ventilation around the generator and clean any debris obstructing airflow. | |
| 4. Excessive Noise Levels | – Unusual or loud sounds during operation | – Inspect the muffler for damage and replace if needed. Adjust engine RPM to recommended levels. |
| – Vibrations and rattling noises | – Tighten any loose bolts and secure all components properly. | |
| 5. Electric Shock from Generator | – Users experiencing electric shocks | – Immediately disconnect the generator from the power source. Inspect and repair any damaged wiring or outlets. |
| – Tingling sensation when touching the generator | – Check for grounding issues and ensure the generator is properly grounded. | |
| 6. Smoke Emission | – Visible smoke during operation | – Examine the oil level and quality. Change oil if it appears dirty or insufficient. |
| – Unpleasant burning smell | – Inspect the air filter for clogs and replace if necessary. |
Addressing these common generator issues promptly will help maintain the reliability of your power source. If problems persist, consider seeking professional assistance for more complex diagnostics and repairs.
Generator Maintenance Tips
Power outages can strike unexpectedly, making a well-maintained generator crucial for ensuring a continuous power supply. Regular maintenance not only enhances longevity but also guarantees optimal performance. Here are some key tips to keep your generator in top shape:
- Scheduled Inspections: Conduct routine checks on your generator to identify any signs of wear, loose connections, or potential issues before they escalate.
- Fluid Levels: Regularly check and replenish the oil and fuel levels to guarantee efficient operation. Proper lubrication is essential for preventing friction-related damage.
- Battery Health: Ensure the generator’s battery is charged and in good condition. A healthy battery is vital for a swift start when power is needed.
- Air Filter Checks: Keep the generator’s air filter clean and replace it as recommended by the manufacturer. A clogged filter can compromise performance and fuel efficiency.
- Coolant System Inspection: Verify the coolant levels and inspect the system for leaks. Overheating can lead to severe damage, so maintaining the right coolant levels is crucial.
- Capacitor Maintenance: Check and test the generator’s capacitors regularly. Faulty capacitors can lead to electrical issues, affecting the generator’s ability to produce a consistent power output.
- Run the Generator Regularly: Regularly starting the generator, even if it’s not in use, helps keep the engine components lubricated and prevents fuel system issues.
- Storage Considerations: If the generator is stored for an extended period, use a fuel stabilizer to prevent fuel deterioration. Empty the fuel tank or run the generator dry before storage to avoid gumming.
Conclusion
In conclusion, How to Fix a Portable Generator With No Power is your roadmap to generator resurrection. Armed with knowledge, you can tackle power outages with confidence. By diagnosing and addressing common issues, you’ll have your generator humming in no time.
Remember, regular maintenance and swift troubleshooting are the keys to a reliable power source. Let this guide be your go-to resource for restoring power when you need it most. With a little know-how, you’ll never be left powerless again.
References
- Electrical generators for large wind turbine: Trends and challenges
- Bio-inspired water-driven electricity generators: From fundamental mechanisms to practical applications
- Power electronic drives, controls, and electric generators for large wind turbines–an overview
- Stabilization of two electricity generators
Frequently Asked Questions
Can I Use My Portable Generator Indoors?
Using a portable generator indoors can pose significant carbon monoxide dangers. To ensure safety, it is crucial to follow appropriate safety precautions, such as proper ventilation and placement of the generator outside or in a well-ventilated area.
How Often Should I Change the Oil in My Portable Generator?
Maintaining a portable generator for optimal performance involves regular oil changes. The frequency of oil changes depends on the manufacturer’s recommendations and usage patterns. Troubleshooting common issues with portable generators may require inspecting fuel supply, spark plug, or carburetor.
Can I Connect My Portable Generator Directly to My Home’s Electrical System?
Connecting a portable generator directly to a home’s electrical system can be unsafe and is not recommended. It is important to follow proper installation procedures and consider alternative power sources such as solar panels.
What Kind of Fuel Should I Use for My Portable Generator?
When considering the type of fuel to use for a portable generator, it is important to compare propane and gasoline in terms of their efficiency. This analysis will provide valuable insights into the optimal choice of fuel for generators.
Can I Run My Portable Generator Continuously for an Extended Period of Time?
Running a portable generator continuously for an extended period of time requires certain precautions to ensure safe operation. It is important to adhere to manufacturer guidelines, regularly maintain the generator, and implement safety measures such as proper ventilation and monitoring of fuel levels.
What causes a portable generator to not produce power?
The common reason for a portable generator failing to generate electricity is the loss of residual magnetism.
Why is there no power when the generator is running?
If the generator is running but not producing power, check for poor connections in the unit’s ports. Cleaning any debris or blockages is crucial before testing power flow by plugging in devices.
How do you restore a generator’s power when it has lost residual magnetism?
To regain the necessary residual magnetism for voltage buildup, one can perform a process known as “flashing the exciter field.” Connect a 12-volt battery with a current limiting device to the exciter field while the generator is at rest. This helps restore the minimal magnetism required to initiate power generation.